Thursday, November 25, 2021

Birthday Tea

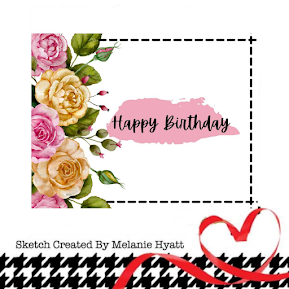
Hi all and Happy Thanksgiving! I have a new layout to share today. I was inspired by this sketch from Sketches in Thyme:


I started with the fun patterned papers from Vicki Boutin's Color Study. The one paper reminded me a sprinkles so I thought it was perfect for a birthday layout. I used a few different papers and a couple of branding strips for my papers. I used my Cricut for the word "Birthday" and some really old punch out alphas for the word "Tea." I knew I had some stickers with a tea set, so I dug those out of my stash and used one for my journaling. For the arrows, stamped them using Versamark, heat embossed them with Stamp and Bond, and then sprinkled blue glitter over that. I finished embellishing my page with some puffy stickers and pink Nuvo drops.

 Thanks for stopping by!

Saturday, November 20, 2021

MEA Trip

Hello! I've had a little time to create again! Today I have a new layout to share. I was inspired by a layout on Paper Issues.

I pulled out my scraps and cut strips to make my rainbow. Once I had all the strips adhered, I pulled out some mists and splattered them along the top and bottom of my layout. I found a splatter cut file on Cricut Access and cut that from a few colors of cardstock. I tucked the splatters behind my photos, along with some stickers and die cuts. For my title, I used my Cricut to cut "MEA" from patterned paper and chipboard. I used letter stickers for the word "trip." I finished off the layout with some flair, a wooden button, and puffy sticker for the Lasting Memories Stash Bash challenge to use wood veneer, buttons and flair.


 Thanks for checking out my layout!


Monday, November 15, 2021

November Calendar Page

Hello again! I'm back today to share my November calendar page. I started with the double page sketch from Stick It Down:


This month I had the opposite problem of what I usually have- I had too few photos! I ended up combining some of the photo spots and using larger photos! I won this beautiful paper collection a while back. It is different from what I usually use, but I was able to make it work for me. This collection has a couple of sheets of cut outs, so I used a bunch of those to embellish my layout. For my journaling, I wrote some on the journaling spot and some on strips to go with the photos. I added some gold splatters to my embellishment clusters and cut my title from gold foil cardstock. 

 Thanks for stopping by!

Sunday, November 14, 2021

A Year to Grow

Hello! I had chance this week to make a couple of layouts. Today I am starting with this one I made for my daughter's album. I started with this sketch from Paper Issues:


I pulled out some pink and purple papers to go with some of the colors in the photos. I ripped the edges of some of the patterned paper and adhered that to my background. I used stamps to add some interest under where I attached my title. For my title, I was inspired to use that big chipboard "grow." I cut the other letters with my Cricut. I stamped and fussy cut the journaling spot. To embellish the page, I used washi tape, enamel dots, border stickers, a chipboard rose and flair. The chipboard and border stickers have been in my stash for quite a while, so it felt good to use them!

 I am entering this in the Stash Buster- punches, stickers, and washi tape challenge at Lasting Memories.

Thanks for stopping by, tomorrow I will finally be sharing my November calendar page!

Saturday, November 6, 2021

Birthday Cards for Boys

Hello! I have two more cards to share for now. The first was inspired by this card sketch from Paper Issues:


I bought a couple of blending brushes a week and a half ago and I wanted to try them with a mask, so that's what I did for this card. I overlapped my cicles and used  a few different colors. I cut the balloons using my Cricut from scraps of patterned paper. While I was looking for paper, I came across the circle transparency and decided to use that under my sentiment as well. I also used my Cricut to cut the sentiment from white cardstock. To finish off the card, I drew strings for my balloons with a black pen and glued on some gold stars.


I used a similar technique on this card as I did on a card I shared a couple of days ago. I inked the cardstock and then embossed the paper. I used my Cricut to cut the lion and write the sentiment. To add a little fun to the card, I used googly eyes on the lion. I also colored in the word "Roarsome" with a gel pen. I finished off the card with gold stars.

 Thanks for checking out all my cards over the last few days!

Friday, November 5, 2021

Birthday Cards with Trapped Inking Technique

Hello again! Today I have a couple of cards that I made after watching this video by Jennifer McGuire (if you are ever looking for inspiration, she does some awesome videos!).

I have a similar stamp to one she used in her video, so I decided to use it for the same technique. I used a rainbow of Distress Oxide colors to stamp my stars and then heat embossed the stars with clear powder. I then inked over the whole background with a couple of colors of blue Distress Inks. I then turned them into a couple of different cards.

First up was a card for my daughter's 13th birthday. I used my Cricut to cut the sunglasses and numbers. It is hard to see in the photo, but I heat embossed the sunglasses with clear powder to make them shiny. To finish off the card, I used some glitter cardstock and cut a border from a scrap of specialty paper. I stamped the sentiment on a scrap of cardstock and cut it into a flag before attaching it to the front of the card.


I actually made two of this next design. I used my Cricut again to cut the unicorn from glitter cardstock and to write and cut the sentiment. I have been enjoying used the writing function of my Cricut to make personalized greetings for my cards. I attached the unicorn with foam tape and that was all this card needed!
Thanks for stopping by!
 

Thursday, November 4, 2021

Birthday and Anniversary cards

Hi all! I'm back with some more cards. I was inspired by this video by Jennifer McGuire. I started by stamping with white ink on black cardstock and then went back with Distress Oxide inks over the top. The effect is pretty, but I should have stamped on the smooth side of the cardstock, not the textured. I embossed some coordinating shimmer cardstock to go across the bottom of my cards and covered the seam with coordinating ribbon. I stamped and heat embossed my sentiments and added a couple of silver Nuvo Drops to finish off the cards.


Wednesday, November 3, 2021

Happy Birthday - Tic Tac Toe Challenge

Hi all! I'm finally out from under a pile of photo editing! Over the next several days, I will be sharing some cards I've made over the last month. First up is a card inspired by the current board at Tic Tac Toe Challenge:


I used the center column for my card. I started by doing some inking over green cardstock. It didn't show up as much as I had hoped, but gave some variation in color. I then ran the piece through an embossing folder. I stamped and heat embossed my main image and sentiment on kraft cardstock. After tearing the edges, I used some brown ink and a blending tool to make the edges stand out more. I punched holes in the sentiment pieces and ran twine through the holes and around the background. To add some interest to the main image, I used glossy accents on the glasses and watch. I finished off the card with some brads.