Sunday, July 21, 2024

A Day at the Zoo- Lasting Memories

Hello! I have my Week 3 layout to share today for Lasting Memories! This week's challenge was to use something for each of the letters in SUMMER- sequins, upper case letters, Mica Stain, mask, enamel dots, rub ons.

I found this collection kit at a scrappy garage sale recently and wanted to use it. I love the colors and patterns! I started with the pink background paper and found the ready made strip for across the bottom. I decided to use a similarly colored Mica stain and a mask to add some subtle leaves to the background. I also used some stamps and Distress Oxide inks to add a bit more texture, but those ended up mostly being covered by embellishments. I then layered my papers and photos on. For my title, I used some chipboard letters. They were patterned, but the colors didn't match the rest of my project, so I covered them in patterned paper to match the rest of my page. I used rub on letters for the smaller words. I also used some rub ons for the embellishment cluster on the right side of the page. I wrote my journaling on a premade journaling piece and added that on the left. To finish things off, I added a canvas flair piece, homemade enamel dots (made from perler beads), and sequins.

 I used the April sketch from the Creative Scrapbooker group on Facebook.


Saturday, July 20, 2024

Confessions- Dance Layout

Hello! I have a new layout to share today! I started with this sketch from Rochelle Spears:

My photos weren't two squares, but I made them work with the sketch. Since the costumes in these photos are black and grey, I stuck with black and white papers. I cut the papers and layered them up. For the tag, I found a journaling card with this bracket shape and fussy cut it. I added the mesh ribbon with a staple and wrote with a white pen. I cut the title using my Cricut and attached it with foam tape for dimension. I added some grey ink splatters for some interest, along with some silver Nuvo drops. A rub on border, a piece of washi tape and a chipboard piece completed this layout.


 This was also my Week 2 layout for the month at Lasting Memories. The challenge was to use something for each letter in SPRING- sketch, polka dots, ribbon, ink splatters, Nuvo drops, and grey.

Monday, July 8, 2024

More Cards!

Hi all! I have a few more cards to share! My first two cards were based on the current card sketch at Stick It Down:


I started by creating two background on different colored cardstock using the Misti and the triangle Turnabout stamp. I then took those background and added items to personalize them. For my brother-in-law, I cut the gears from silver cardstock and added gold brads to the centers. I stamped and heat embossed the sentiment on a scrap of silver cardstock and cut it into a banner. The white card base was a little stark with the darker card background, so I took the Black Soot Distress Oxide pad and rubbed it over the edges of the card front to make the frame.


For this card for my nephew, I used a cute puppy stamp on grey cardstock. I painted a few details with a water brush and the ink pads. I cut the bones from the same cardstock using my Cricut. I edged them with black ink to make them stand out more. I also covered them with Glossy Accents to add dimension. I again took a scrap of cardstock, stamped the sentment and cut it into a banner.


This final card is for my son. He got a phone for his birthday, so I went with that theme. I just cut a couple of rectangles using my cricut. I used a blue pen and my Cricut to add the sentiment. I found some small birthday stamps in my stash and made a row of them across the bottom like apps and added a date stamp across the top. I used a background stamp on my background and added some sequin stars to finish off the card.


Sunday, July 7, 2024

July Calendar Page- Lasting Memories Guest Designer

Hello! I am excited to share that I am guest designing for Lasting Memories this month! Here is my take on the first challenge of the month! I started with this sketch from Stick It Down:
I wanted to include more than four photos on my layout, so I adjusted the sketch and made it work for eight. I started by adding the patterned paper to my white cardstock. I added some stitching with my sewing machine. I matted the photos to make them stand out a bit more on the busy background. I then decided I wanted a little more interest in the white parts, so I cut the stars using my Cricut. I used my computer to type up and print the journaling strips. For my title, I used a couple of sets of letter stickers. I then added some gold ink splatters around it. To finish off the page, I used some flair, puffy stickers and banner stickers. 

 The first challenge this month is to use something that starts with each of the letters in "WINTER." I used:

W- white 
I- ink splatters
N- navy
T- typed journaling
E- Echo Park
R- red

You can see how the other designers interpreted this challenge here.

Saturday, July 6, 2024

Alcohol Ink cards

Hello, I have some new cards to share today! For this set of cards, I started with a 5x7 sheet of Yupo paper. I used alcohol inks to color it. Then I used a large background stamp and Alcohol Ink Lift Off ink and lifted some color off of the paper. 

I trimmed down the sheet to 5 1/4 x4 for my first card. I didn't want to cover much of the design, so I cut a sentiment with my Cricut and added that to my card. Then I punch a couple of flowers to add to the card front. I finished it off with some silver Nuvo drops as flower centers and accents on the design.


I took the ink that I had lifted and stamped it onto a piece of light purple cardstock. I blended blue, pink, and purple Distress Inks over the design to add some depth. I stamped and heat embossed the sentiment. For the butterflies, I stamped and fussy cut them before adding them to the card. For some added interest on the background, I splattered some shimmer mist to react with the inks. I finished the card off with some Liquid Pearls. I matted the card front on a darker purple to add a frame.


For my last card, I used a background stamp and Distress Oxide ink on dark purple cardstock. I used the scraps from trimming down the first card front on the bottom half of this card. I cut the cupcake with my Cricut using coodinating papers. To finish off the card, I stamped the sentiment and used a puffy flower sticker to cover where one of my cuts got too close to a previous cut.


Thursday, June 27, 2024

Birthday Card- The Card Concept

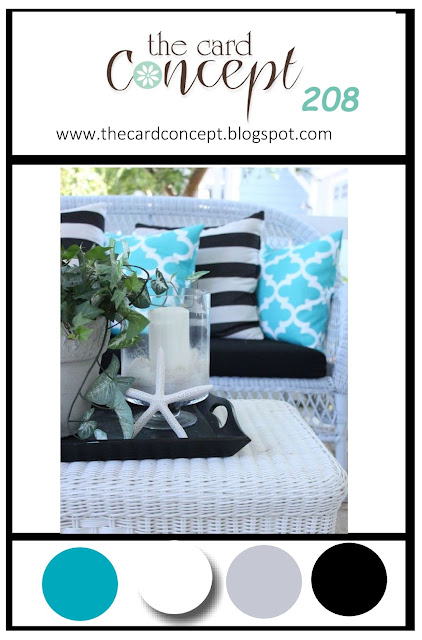
Hello, I have another card to share today! I was inspired by the challenge at the Card Concept:

I love the colors in the inspiration photo, so I started with them. I used a set of layering masks to make the floral background panel. I then found some cardstock in a similar color and used a harlequin background stamp and the same grey ink I used for the blending. I liked the pattern on the pillows in the inspiration photo, this was the closest I had to that pattern. I then used my Cricut to cut the flower from the same color of cardstock. I inked the edges for some interest. I also used a shimmer pen on the grey circle to add a bit of sparkle. I layered a "Happy Birthday" banner over the top of the flower. Once I had all of that on my card front, I felt like it needed a bolder border, so I used a pen and ruler and drew the border around the blue cardstock panel.


Wednesday, June 26, 2024

Birthday and Wedding cards

I have a few more cards to share today! First up is a wedding card. This one came together pretty quickly. I started with a flower background stamp and silver embossing powder on grey cardstock for the background. I then stamped and heat embossed the cake and sentiment on vellum. I layered those over silver cardstock. I used a basic satin ribbon across the bottom to attach my sentiment and then added the cake piece to white cardstock to add a border.


Next I have a pair of birthday cardst I created. I started by using and blue ombre inkpad on the stripe background stamp and stamped that on white cardstock. I then used star punches and punched a bunch of stars from different red papers. I layered those over the stripes, concentrating them at the top and popping some up with foam tape. I stamped and fussy cut the sentiment banner and attached that over the stars. I added a thin red border around my panel before attaching it to my card.

 I used this week's Tic Tac Toe board and the right column: layers, stripes, bright colors.