Friday, June 29, 2012

Two More Cards for the Week

Here are my last two cards for this week, two birthday cards!

 The first is a card for a friend who is celebrating her golden birthday today and having a party tonight. I wanted to include some gold on the card, so I decided to go with gold paint.  I pulled out my Adirondack acrylic paint dabber. While I was trying to get the paint to flow, the top popped off so I ended up with a big pile of paint on my scratch paper.  (How are you supposed to get the paint to flow out of those things?? I press the tip on paper over and over and nothing comes out, so then I squeeze the bottle and the top pops off!  Any suggestions would be greatly appreciated!)  Since I had a pile of paint and no brush (I was upstairs in my dining room so I could hang out with my kids) I decided to spread it with my finger.  The paint got kind of blobby (totally not a word, but I'm using it anyway) around the edges of the paper, but I do like how it turned out on the dry embossed paper on the bottom.  I stamped some swirls and flowers on the center piece with ink and then rubbed the paint dabber tip in the spilled paint to "ink up" the sentiment stamp.  A couple of stickers popped up with foam adhesive and the card was done!

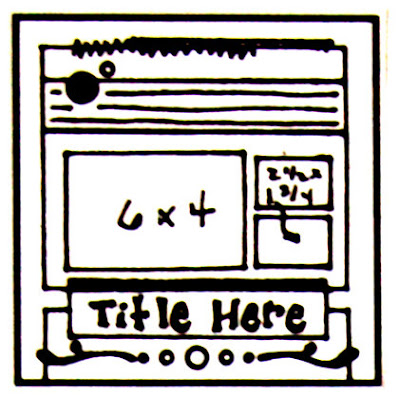
I used this week's Card Pattern for this card.  Sadly, this is the last one as the site owner has decided to stop.  :(  I will miss those sketches!

Finally, I have a birthday card for my father-in-law whose birthday was yesterday.  I used this week's Mojo Monday sketch.  I played again with heat embossing over dry embossing and I am really happy with how this one turned out!  For the background of my card I used a Crafter's Workshop mask, my foam blending tool and Walnut Stain Distress ink.  For the leaf, I stamped it and then poured embossing powder over only part of it to made a more distressed look.

Thursday, June 28, 2012

Cards Using My Kit

With three birthdays, one anniversary and a birth, I have been busy this week making cards! I am going to share three of them tonight that used my Counterfeit Kit and some sketches.

 This first card is a birthday card for my grandma whose birthday is today. I used the card sketch posted this month at the Counterfeit Kit challenge blog. I also used the new "summer" distress ink colors. I love how bright they are! I used Resist ink to stamp the flower and the word "Happy" and then rolled over them with an inked up brayer.  To add a little interest to the transparent blue accents, I attached them to my page with glitter glue.

Materials-
Cardstock- Bazzill, Ranger
Patterned Paper- Die Cuts With a View, Provo Craft
Ink- Ranger
Stamps- Close to My Heart, Limited Edition
Tape- Target
Acrylic Accents- Heidi Swapp
Brads- Basic Grey
Cricut Cartridge- Storybook

Next is a card I made for a friend who had a baby almost two weeks ago.  Again I used some of the new Distress Inks, but this time I used my star Crafter's Workshop mask and the sponge inking tool.  The flower and letter blocks for the word "baby" were cut out using the "New Arrival" Cricut cartridge.  I used this week's Unscripted Sketch as inspiration.
Materials-
Cardstock- Bazzill
Patterned Paper- Die Cuts With a View, Provo Craft
Ink- Ranger
Stickers- Provo Craft
Mask- Crafter's Workshop
Twine- Pink Paislee
Cricut Cartridge- New Arrival
Glitter Glue- Ranger

Finally, I made this anniversary card for my sister and brother-in-law whose anniversary is Saturday. I used the current sketch at Sketch Saturday for this, but rotated it and made a few slight adjustments to fit the new orientation.  
Materials- 
Cardstock- other
Patterned Paper- Chatterbox, Robin's Nest, Die Cuts With a View
Stamps- Stampin Up
Ink- Tsukineko, Ranger
Sticker- Little Yellow Bicycle
Buttons- My Mind's Eye, Jesse James Co.

Check It Out!

My "Rockets' Red Glare" layout is featured on the Scrapbook and Cards Today blog!  You can see it and several other awesome celebration layouts here!

Tuesday, June 26, 2012

Nuts About Sketches #219

I am a day late on this, but here it is. Yesterday a new sketch was posted at Nuts About Sketches. This time it was a fun single page layout.
   

 This was another layout that came together really fast. It helped that the photos were already printed on the 8x10 collage.  I wasn't sure how I was going to scrap these photos, but when I saw this sketch, I immediately thought of these photos and how they were laid out.  Keep that in mind the next time you have a preprinted collage you need to scrap, you can use a sketch for them too!  I decided to limit my colors to black, white, and red to bring out the red and white costumes and downplay the turquoise.  I played a bit with my sewing machine to add the border.  I've seen other layouts where people go from straight to zig zag stitch and decided I wanted to try it.  I really like how it turned out, and I will definitely be doing it again.


Materials
Cardstock- American Crafts, The Paper Company
Patterned Paper- Provo Craft, Doodlebug Designs
Marker- Marvy
Pen- Zig
Flowers- Prima and Kaiser Craft
Brad- Basic Grey
Buttons- Jesse James Co., Other
Dew Drops- Robin's Nest
Ribbon- Doodlebug Designs, other
Photo by Sunshine Photography

Thursday, June 21, 2012

Second Quarter Top 5

Ashley Sisk is hosting another quarterly link up on her blog.  The challenge is to select our favorite 5 photos of our kids (or pets) from the last 3 months.  I had a lot more to pick from this time thanks to warm weather so we could get outside and use some natural light!  Here are my top 5:


I've shared this one before, but I really like this photo of my little "duck hunter" carrying his ducks home.

I just love the sweetness of Addy holding up some flowers she picked for me. What mom doesn't love a bouquet of dandelions?? :) 
 

I have also shared this one before, but I enjoy how I caught my little guy in the moment, a moment that truly shows off his personality.

This one is a photo of Ellie doing something I see her doing often; helping her brother or sister. Here she is picking chives and handing them to her brother to try. She is such a great big sister! 
 

 I have shared this one before too, but this is my favorite photo of the year so far. I just love the bliss on Addy's face and how I caught her mid-air. 
 

Well, there are my top 5.  I am looking forward to the warm weather and taking lots more photos in the months to come!


Click.Pray.Love.

Happy Birthday- Sketch and Color

I'm back with yet another birthday card. This time I used the current sketch at Sketch Saturday and the current color challenge at The Play Date Cafe.

 I bought a couple of sets of stamps last night at our church's garage sale and I used one of them on this card.  The set I used is by Close to My Heart and is called "It's Your Day."  This set is really fun and I can see myself using it over and over!  I used my Cricut and the "Storybook" cartridge to cut out the center piece.  The cake pieces are stamped and the sentiment and bursts are stamped and heat embossed.


Wednesday, June 20, 2012

Happy Birthday With a Sketch and Ombre

I have another card to share (yes another, I am related to a lot of people celebrating birthdays and anniversaries this month). For this card I used the current sketch at Mojo Monday.  I'm really enjoying the small squares down one side, they are so fun to embellish!


I also used stamps and paper from my Counterfeit Kit for this.  ScrapFit has a challenge right now to make some kind of ombre effect on a project.  Ombre effect is where one color fades into another or a single color fades from dark to light.  You can see several great examples here.  For mine, I decided to use glossy cardstock and distress inks.  I stamped the image first with Resist Ink.  I let that dry and then rolled my brayer over the two colors of Distress Ink and then rolled them onto the Glossy Cardstock.  The trick is to roll so that the colors overlap to create the fade.  I think it turned out pretty cool and I think I will be trying this some more with some of my other colors! The square in the bottom corner was also stamped with Resist Ink on Glossy Cardstock, but I just rolled over that with blue ink.
 

Materials:
Glossy Cardstock- Ranger
Patterned Paper- Die Cuts With a View, Chatterbox
Ink- Ranger
Ribbon- Target
Stamps- Stampin Up
Punch- Tonic
Liquid Pearls- Ranger

Happy Birthday!

Sunday was my niece's 16th birthday.  I made a card for her using the current sketch at Cardabilities. I loved the little squares down the right side. I found this fun cardstock sticker and decided to build my card around that. For the yellow squares, I used Core'dinations cardstock and ran it through my Texture Boutique using an embossing folder.  Then I sanded the raised part, added Stickles in one of the recessed areas and a gem in the middle.  The current challenge at Scrap Your Crap is to emboss, so this card fits that challenge as well.  Another quick card that turned out pretty cute!  
 

Materials-
Cardstock- Core'dinations, Michaels
Patterned Paper- Robin's Nest, Bo Bunny Press, Making Memories
Sticker- Bo Bunny Press
Glitter Glue- Ranger
Gems- Hero Arts

Tuesday, June 19, 2012

Happy Anniversary!

Today is my aunt and uncle's 30th wedding anniversary (as well as my husband and my 8th anniversary). They had a party on Saturday and so I made this card for them using the current card sketch at Sketches: Creatively Yours.  I used some more of my Counterfeit Kit on this one.  The circle of flowers was stamped, heat embossed and fussy cut.  I then layed a punched scalloped circle and the sentiment over it.


Materials:
Patterned Paper- Autumn Leaves, Chatterbox, Die Cuts With a View, Hot Off the Press
Stamps- Limited Edition, Stampendous
Punch- EK Success, Marvy
Ink- Tsukeniko
Embossing Powder- JoAnn Crafts
Ribbon- American Crafts


Monday, June 18, 2012

Nuts About Sketches #218- Smile

Today a new sketch was revealed at Nuts About Sketches.  I really enjoyed working with this sketch, this page came together so quickly!  I used a lot of premade product, so that probably helped.  I cut out the cupcake using my Cricut, and the word "Smile" was something that I had cut out long ago, but was the wrong size for the project at the time.  I pulled it out for this because it was the perfect color.  It was a little big to fit where the sketch said to put the title, so I moved it and added the words "it's your birthday!" in pen underneath.


Materials-
Cardstock- American Crafts
Patterned Paper- Bo Bunny Press, Fiskars, Hot Off the Press
Stickers- Bo Bunny Press
Pens- Creative Memories and Marvy
Flowers- Prima and Petaloo
Die Cutter- Provo Craft
Cartridge- Doodlecharms and Mini Monograms
Punch- Martha Stewart
Ribbon- Making Memories
Rub ons- K and Company
Glitter- K and Company, other
Glitter Glue- Ranger
Liquid Pearls- Ranger
Dew Drops- Robin's Nest

Sunday, June 17, 2012

Happy Father's Day!

Happy Father's Day to all the dads out there! I am sharing the cards I made for my dad and my father-in-law. I used my Counterfeit Kit and some sketches.

 For this card, I used last week's sketch at Sketch Saturday.   I rotated the sketch 90 degrees to make it work with the image I wanted to stamp.  I distressed the background A LOT.  First I ran it through my Texture Boutique using my "Heavy Duty" embossing folder.  Then I rubbed Versamark ink over the card.  After that, I poured gold embossing powder over it and shook off the excess.  I heated the embossing powder and then decided I wanted to see how spray ink reacted with the heat embossing.  I sprayed white ink on the card, but I felt it was too bold and covered up the embossing too much so I patted it with a tissue to mute it.  Finally I distressed all the edges and rubbed white distress stain on the edges of the cardstock.
 
Materials:
Cardstock- Bazzill
Patterned Paper- Autumn Leaves, Robin's Nest
Embossing Folder- Couture Creations
Ink- Tsukineko, Studio Calico
Embossing Powder- JoAnn Crafts
Stamp- Stampin Up
Brads- Michaels

For my next card, I used last week's Card Pattern.   I used another embossing folder on this one, giving the yellow paper some texture.  I liked the black strip down the center of the card and decided I wanted to try doing it with washi tape.  I like how that turned out, but I'm not a fan of the embellishment cluster on top... oh well.  I also did this for Mini Challenge #1 as part of the My Scraps and More Got Talent II contest.  The challenge was to make a card using something old, something new, something borrowed, something blue. The old item was the chipboard, new was the tape, borrowed was the sketch and blue is the paper.
Materials:
Cardstock- Bazzill
Patterned Paper- Autumn Leaves, Robin's Nest
Tape- Target
Chipboard- Heidi Grace
Brads- Michaels
Epoxy accents- EK Success
Stamp- Stampin Up
Pen- Marvy
Ink- Ranger
Embossing Folder- Ellison
Punch- Marvy

Monday, June 11, 2012

Scavenger Hunt Sunday 6-10-13

I am a day late on this. I tried to work on this last night, but then a severe thunderstorm rolled through with lots of lightning so we shut down the computer. We (Rick and I spent the weekend "up north" without the kids, so I have only one kid photo this week, the rest are from our trip.

Travel
This one was pretty easy since we went on a trip, I had plenty of options. I chose this one of the Two Step Falls at Tettagouche State Park. I have been wanting to play with shutter speed and this was the perfect opportunity (not to mention it made lugging the tripod on our hike totally worth it!).

 
Silly
Ellie playing in Grandpa and Grandma's pool, blowing water out of the end of a foam noodle. The kids got lots of pool time during their stay at Grandpa and Grandma's this weekend.


Black and White
On Sunday morning, Rick and I went for a walk along Lake Superior (where the place we stayed was located). As we were walking we found this gorgeous spider web with dew droplets on some driftwood.

Spots
We found these cute little yellow wild flowers all over the place on our hike.  It was refreshing to see these spots of color in the mostly green landscape.

Paper
Okay, this one may be a bit of a stretch.  Not actual paper, but trees are sometimes turned into paper, right??  This tree was growing out of the side of one of the cliffs surrounding the Baptism river.  We thought the tangle of roots was cool.


Nuts About Sketches #217- Smart Play

It's Monday, which means a new sketch was revealed at Nuts About Sketches. This week it was a two pager with columns of photos.

 
I used photos of Ellie from the Children's Museum about a year and a half ago.  I also used paper and embellishments from my Counterfeit Kit. Most of the cardstock that I selected for my kit was single pages, so I chose two colors and splattered the opposite color of mist on it.  To pull the two pages together, pulled another sheet of the green and blue text print so that would span both pages, pulling them together.  I felt that the patterned papers were a little too busy to be next to each other, so I matted the strips with blue cardstock to break up all the patterns.  See those felt flowers?  That's all I had left of the package, so I used them up, woo hoo!!

You can check out what the rest of the design team did with the sketch here.

Friday, June 8, 2012

Counterfeit Kit Challenge

I have been following the Counterfeit Kit Challenge blog for some time now, but never participated in making my own kit. The premise is that they select a kit from a kit club on the web and scrappers are to be inspired to create a kit of their own using the supplies they already have. I have been trying to focus on using what I have lately, but I have also noticed that I have been reaching for collection packs first because everything is coordinated. I decided to participate this month in the hopes that it would get me to use up some of what I already have. The challenge this month was a little different too; they gave a recipe of sorts and scrappers can take it in whatever direction they want. Here is the recipe:


  • 10 sheets patterned paper
  • 8 sheets cardstock
  • 2 alphabet sets
  • 2 stamp sets
  • 4 journaling spots
  • 3 types of "choose your own" style embellishments (flowers, border strips, ribbon, anything you like)
  • 1 roll washi tape
  • 1 "old" embellishment 
  • 1 messy item (paint, embossing, mists, etc)
  • 1 other item of your choice


  • Here is what I came up with for paper (I have already added a sheet of dark blue cardstock and a second sheet of the blue and green text print paper):
     
    And here are my embellishments (I have added a pack of chipboard and some gel acrylic accents):

    I will not list individual products or manufacturers here, but will list them at the end of my project posts.  So far I have created a two-page layout and two cards with this kit.  The cards you can see in my two previous posts and the layout will be posted on Monday.  Having this stuff pulled has made my process a bit quicker and has also encouraged me to use stuff that I've had around for a while and use it up!  I don't really have a goal for how many projects I want to make from this, I'm just interested to see how long it lasts!

    Thursday, June 7, 2012

    Sketch Saturday #210- Happy Anniversary

    Here is card #2 for the month. This time it is an anniversary card for my sister-in-law and brother-in-law who celebrate their 7th anniversary on Sunday.  For this one I used the current sketch at Sketch Saturday.
    .
    The yellow tag is stamped with VersaMark Dazzle ink, which is a watermark ink with some silver glitter in it.  This card came together pretty quickly and I really like it!

    Materials-
    Patterned Paper- The Robin's Nest
    Cardstock- American Crafts
    Stamp- Stampin' Up
    Sticker- Little Yellow Bicycle
    Flower- Prima
    Eyelet- Making Memories
    Gems- Hero Arts
    Ink- Tsukeniko
    Twine- Pink Paislee

    Frosted Designs- Happy Birthday

    As those of you who have been following me for a while may know, there are a lot of birthdays and anniversaries in our family during the months of June and July. This weekend begins that rush. My sister's birthday is Saturday and I made this card today using the current card sketch at Frosted Designs.  

     
    For the background, I used a mask and some spray ink to make a subtle pattern down the center.  I pulled out some stamps and embossing powder for the flower and sentiment.  I used some decorative tape (AKA washi tape) across the bottom.  When washi tape first came out as a new trend, I didn't get it, but as I use it more, I totally get it.  It is quick and easy to use, just stick it down and you are done. I also like that the stuff I have is a little transparent, letting any background patterns show through.

    Materials:
    Patterned Paper: The Robin's Nest, Die Cuts With a View
    Spray Ink- Tattered Angels and Studio Calico
    Stamps- Stampin' Up
    Ink- Tsukeniko
    Embossing Powder- JoAnn Crafts
    Button- My Minds Eye
    Tape- Target

    Monday, June 4, 2012

    Nuts About Sketches #216: What a Goof!

    The new sketch has been revealed for the week. This time it was a fun single pager! My middle child makes some of the best facial expressions, and so I decided to make a layout about them. These are all from when she was about 2 years old!
    I used the Dear Lizzy Neapolitan line for this layout.  I wanted a fun, whimsical feel, which I think I got, but I also feel like it may be a little busy...

    Make sure to head over to Nuts About Sketches and check out what the rest of the team did!

    Materials:
    Cardstock- Bazzill
    Patterned Paper- Crate Paper, American Crafts
    Rub ons- We R Memory Keepers, Making Memories
    Stickers- American Crafts, Pink Paislee
    Transparency- Die Cuts With a View
    Ribbon- EK Success, Making Memories, American Crafts
    Die Cut- K and Company
    Stamps- KI Memories
    Ink- Tsukeniko
    Embossing Powder- JoAnn Crafts
    Punch- Marvy, EK Success
    Pen- Creative Memories

    Sunday, June 3, 2012

    June Calendar Page (Finally!)

    I did not get my calendar page done in time for the beginning of the month this time, but I was close. I got sick on Thursday and was completely out of commission that day and that set me back a bit. Anyway, here is my layout for the month for Project 12 and I am using the right hand page on my calendar this month.

    I used another Sketch Support sketch this month, but it looks like it may be my last for a while as Allison has decided to take a break.  :(  I think I will switch over to using Nuts About Sketches sketches since they are awesome and there is always at least one two page sketch per month!


    I used some Creative Imaginations paper for this layout.  It isn't my usual style, but I thought it worked pretty well with all the vacation photos.
    For the popcicles and ice cream cones, I used my Cricut and the "Doodlecharms" cartridge.  After I had cut all the pieces and glued them together I covered the ice cream part with Glossy Accents and let them dry.
    The Scrapping Everyday Miracles blog is celebrating its birthday and one of the challenges this weekend is to make a summer layout.  So here's my summer layout!

    Materials
    Cardstock- Bazzill Basics, The Paper Company
    Patterned Paper- Provo Craft, Creative Imaginations, Die Cuts With a View
    Stickers- Creative Imaginations
    Tape- Target
    Chipboard_ K and Company, Making Memories
    Punches- Marvy
    Pen and ink- Tsukeniko
    Adhesive, 3M, Ranger
    Pen- Creative Memories
    Die Cutter- Cricut
    Cartridge- Doodlecharms