Wednesday, December 27, 2023

Chitty Chitty Bang Bang

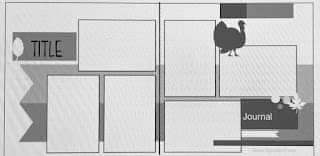
Hello! Today I have another dance layout to share! I was inspired by Day 4 of the 12 days of Christmas challenge at Paper Issues- 4 word title, 3 accent papers (I went over on this one), 2 photos and one sheet of cardstock (or I went over on this one, depending how you count it). 

I started with the black and blue color scheme and cut the two large blocks of patterned paper and used a border punch to create the strip across the bottome. Then I looked up the movie poster for Chitty Chitty Bang Bang to get some further inspiration as to how to embellish the layout and the title was red and yellow. I decided to go with orange and yellow and add them to my layout. I cut the car with my Cricut, as well as the title. I found a chipboard frame for my journaling and then finished the embellishing with a little phrase die cut, puffy stickers, washi tape, some silver brads, and black gems.


Tuesday, December 26, 2023

Happy Anniversary card- Sketch Saturday

Hello, I have a new card to create today! I started with this sketch from Sketch Saturday:

I found the yellow patterned paper scrap in my stash and it was the size of a card front. I trimmed part of it off. I used the part I trimmed off as a pattern for the cardstock pieces down the side. Once I had all of those adhered to the card front, I realized I had attached everything backwards (the card opened to the left). I pulled up the patterned paper panel and just flipped it over. That is why my card is flipped from the sketch. I then added the daisy ribbon, stamped and heat embossed the sentiment and created a little flag. To add a little more interest to the front of the card, I used some pink Nuvo drops and gold Liquid Pearls to go over some of the dots in the heart.


Monday, December 25, 2023

Scott County Fair

Hello and Merry Christmas! The festivities are winding down here so I thought I would jump on and share this layout I made the other day. I had six photos to scrap and I wanted to try to get them on one page. I decided to make a grid design to cut down on the busy-ness. I found the cute journaling card and mounted that on a large piece of patterned paper and then arranged my photos and cut some more patterned paper block. I used my Cricut to cut the title. I used punched for the banner and mounted the pieces on foam tape for dimension. The speech bubbles were fussy cut from a sheet of patterned paper. I kept the embelllishments simple with some puffy stickers.

 I entered this in the 1st day of Christmas challenge at Paper Issues- use one piece of cardstock on your layout.

Saturday, December 23, 2023

Shake It Up- Sketches In Thyme

Hi all! I'm back with another layout! I was inspired again by at Sketches in Thyme sketch:

I scrapbooked some more dance photos of my oldest daughter. You will be seeing lots of these layouts, she is graduating in a year and a half, and she wants this album done for graduation! 😱 I started by searching my stash for papers that went with the colors of this costume since they were so bright! Once I gathered those up, I cut them into wedges and arranged them behing my photos. For my title, I used my Cricut and a piece of paper I had created a while back and cut the letters. I found the orange tag in my stash and wrote the details on there. I wasn't quite the right orange, so I added some yellow Stickles gel over it to see if that helped- it didn't. I ended up finding the orange puffy stickers and adding those around the page to bring the orange in a few other places and make it look like it belonged. A few die cuts, a transparency phrase, and some sticker "sequins" completed the layout.


Friday, December 22, 2023

Life Is Better at the Lake- Sketches In Thyme

Hello! I have been busy making scrapbooking pages! First up is a two page layout that started with this sketch from Sketches In Thyme:
May be a black-and-white image of text that says 'photo photo createdby Rochelle Speans for sketches thyme H >>>>> Title Here'
I took the sketch and turned it 90 degrees to the right to make it work with the direction of my photos and so I could stretch the banner across both pages. I worked again with the September kit from The Scraproom. I cut the title using my Cricut and then embellished my page with die cuts and enamel dots from the kit. I also found a few items from my stash to fill in. Once everything was down, I decided I wanted more interest across the bottom. Initially, I was going to ink waves, but then I pulled out this stone mask and used some modeling paste (that I colored with some Distress ink and spray ink) to make ther stones across the bottom of my layout. I wanted them a little darker, so once the paste was dry, I used a blending brush and Walnut Stain Distress Ink and rubbed the ink over them.

 I am also entering this in the Lasting Memories "CAMPERS" challenge, use some thing for each letter of campers- Cricut, American Crafts (cardstock), Mask, Paste, Enamel Dots, Ric Rac (the blue squiggle on the right hand page looks like ric rac), and Sketch.

Thursday, December 21, 2023

January Calendar Page

Hello! I just finished my first calendar page for 2024! Can you believe we're less than two weeks from the New Year?! I started withe double page sketch from Stick It Down:


I started the layout by stamping and heat embossing snowflakes on my cardstock background. The heat embossed snowflakes are a little hard to see as they are white pearl and pale blue with sparkle embossing powder. I then dripped and smooshed some light blue ink over the snowflakes. Once all of that was dry, I adhered my photos and patterned papers. This sketch lends itself well to using up scraps as I used mostly strips of paper on this. I stamped journaling lines in the upper right for my recap of the month and added strips to my photos for captions. I used my Cricut to cut my title from shimmer cardstock in a coordinating color. For embellishments, I used stickers, a brad, glitter enamel dots, and puffy stickers. 


 Thanks for stopping by to check out my layout!

Wednesday, December 20, 2023

Happy Birthday

Hello, I have a new card to share today! I was inspired by the Tic Tac Toe Challenge board from a couple of weeks ago: 

I went with the bottom row- Free, embellishment, and die cut. I started my card by using a mask and some Distress Oxide inks to ink the circles on the background. Then I used my Cricut to draw and cut the present. I used a metallic pen to color the ribbon on my present. I stamped and fussy cut the sentiment banner before attaching it to my card. I felt the card needed something between the present and sentiment, so I used a strip of washi tape. To finish off the card, I glued on a sprinkling of sequins.


Saturday, December 16, 2023

Dan Patch Days- Take 2

Hello again! I have another new layout to share. My kids have COVID, so I'm hiding in my craft room to try to avoid it so I'm getting some scrapping done!

This layout started with this sketch from Paper Issues:

I started by trimming my photos to 3x3 so I could make a single column on my page. I then found the paint stripe patterned paper. I trimmed that down to create the illusion of the frame suggested by the sketch. I decided to add some smooshing of the same colors down the right side of the photos so I went to work finding ink colors in my stash that matched my patterned paper. The little swatch book I made a while back was very helpful here because I was able to match the stamped color to the patterned paper. I ended up with a mix of inks from Distress, Stampin Up, and ColorBox. I am very happy with how well they ended up matching the colors of the patterned paper. While that dried, I fussy cut the circles, hearts and popcicles from patterned paper from this collection. I punched the flowers and stars from scraps. I stamped some stars over the smooshing in white, which ended up not showing up very well. I added the pieces I had fussy cut with regular adhesive and a couple of thicknesses of foam adhesive. I stamped the title with a darker turquoise color, along with the journaling lines. Since there were touched of black in the patterned paper circles, I wrote my journaling with a black pen. To finish off my layout, I used some enamel dots and a couple of canvas flair buttons.


 I am also entering this in the Walk in the Park challenge at Lasting Memories.

TTYLXOX- Sketches In Thyme

Hi all! I have a new layout to share today! It started with one of this month's sketches from  Sketches In Thyme:

I started with a piece of cardstock with resist stars on it. I took a Black Soot Distress Oxide ink pad and drug it across the page to create the black areas. I used a towel to rub the ink off the resist stars. I then found patterned papers and embellishments in pink to add around my photos. I used the title of one of the songs they danced to as the title of the page. The letters I found didn't have any "Ts" left, so I used Ks and trimmed and layered them to make the Ts. I also entered this in Day 2 of the Paper Issues 12 days of Christmas challenge, which was to use one sheet of cardstock and two photos.

Thanks for stopping by to check out my layout!

Friday, December 15, 2023

Happy Birthday- Sketch Saturday

Hi all! I have a new card to share today, using last week's sketch from Sketch Saturday

I started by running the black background panel through my embossing machine in an embossing folder. I then took washi tape to make the stripes. I splattered the background with brown spray ink to give it the appearance of mud. I accidentally dropped my card base on the black panel while the ink was wet so I ended up with splatters on that as well. I then found some coordinating cardstock to make th truck. I cut that with my Cricut and attached it to the card with foam adhesive to set it off of the black background. I stamped the sentiment on coordinating cardstock and then trimmed the little banner and attached it to the card front. 


Tuesday, December 12, 2023

A Trio of Cards

Hello! I have three new cards to share today! First up is a card using the current card sketch from Stick It Down:

I started with a stamped background. This is actually the ink I lifted off the alcohol ink backgrounds that I used for Father's Day cards. I then took a piece of watercolor paper, some blue inks, and water and did the smooshing technique. I stamped and heat embossed the tree and sentiment on white cardstock and then edged those pieces with blue ink.I finished off the card with some sequins stars.


Next up is a card I made for my daughter's 17th birthday. I was inspired by last week's Tic Tac Toe challenge: 
I did the right column. I used my embossing machine and a snowflake folder on light blue cardstock. I took a white ink pad and rubbed it over the snowflakes to add a bit more depth to them. I then used the Altenew butterfly layering stamp set to stamp the butterflies. I fussy cut them and attached them to the card with foam adhesive. I made a quick little banner to stamp my sentiment and finished off the card front with some pearls.


Finally is a card I made for a friend who was ordained a deacon this weekend. I started by stamping a script text background stamp on the pearl background paper with Versamark and heat embossing it with clear powder. I added the gold spotted acetate strips. I stamped and heat embossed with gold powder the hands and sentiment on vellum. I ran the vellum and acetate through my sticker maker so the adhesive would be uniform and harder to see. I finished off the card with some twine for a rustic touch. 


Saturday, December 2, 2023

December Calendar page

 Hello all! I have my December calendar page to share today! I started with the November double page sketch from Stick It Down:


I bought a Christmas warehouse box last year from Simple Stories and this layout was finally my chance to play with the more Christmassy stuff. I started by finding some patterned papers that went well with my photos. Once I had attached the banners across the bottom half of both pages, I used my sewing machine to create the frame with white thread. I wanted my photos to pop, so I matted them on white cardstock. For my journaling, I typed it up and printed it on white cardstock that I cut into strips. To embellish the page, I found some frames to add to a couple of the photos and then used some die cuts and brads to finish off the clusters. To add a bit of dimension, I added Glossy Accents to the little hearts in my clusters.


I am entering this in the Lasting Memories Thankful for Words challenge since I used lots of them and used a list form for my journaling to list off everything we did last December.