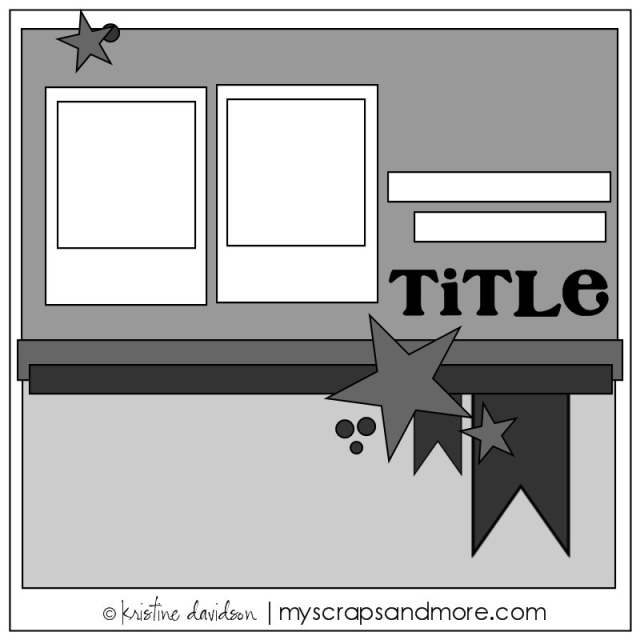
Showing posts with label sewing. Show all posts

Saturday, December 2, 2023

December Calendar page

 Hello all! I have my December calendar page to share today! I started with the November double page sketch from Stick It Down:
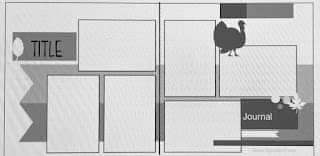


I bought a Christmas warehouse box last year from Simple Stories and this layout was finally my chance to play with the more Christmassy stuff. I started by finding some patterned papers that went well with my photos. Once I had attached the banners across the bottom half of both pages, I used my sewing machine to create the frame with white thread. I wanted my photos to pop, so I matted them on white cardstock. For my journaling, I typed it up and printed it on white cardstock that I cut into strips. To embellish the page, I found some frames to add to a couple of the photos and then used some die cuts and brads to finish off the clusters. To add a bit of dimension, I added Glossy Accents to the little hearts in my clusters.


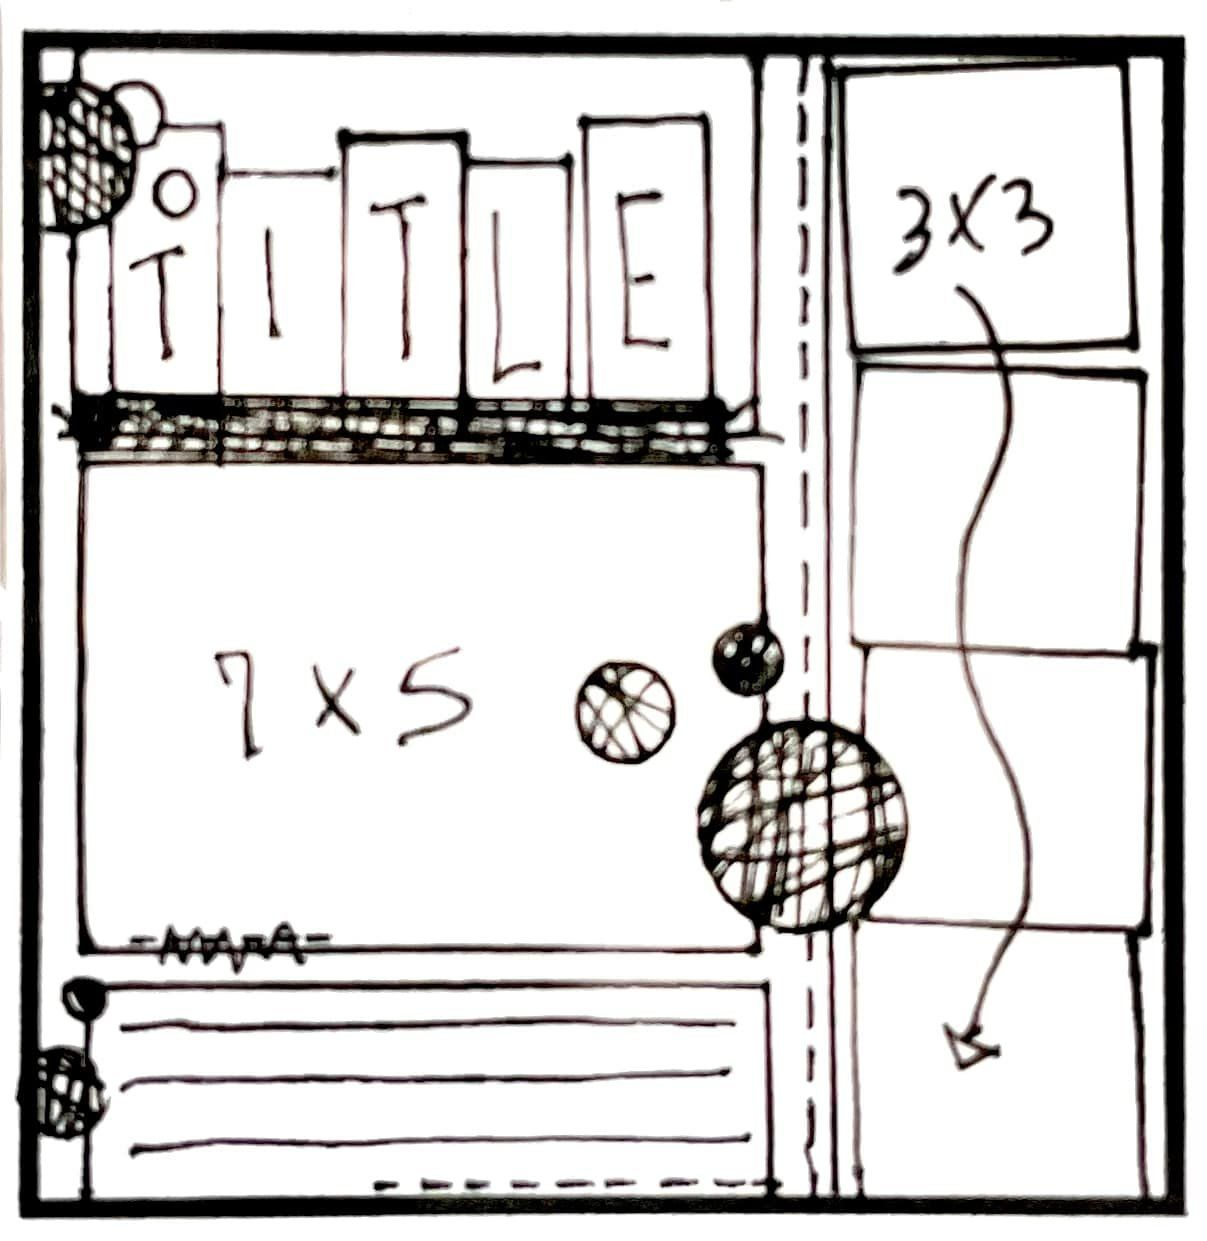
I am entering this in the Lasting Memories Thankful for Words challenge since I used lots of them and used a list form for my journaling to list off everything we did last December.

Monday, November 27, 2023

Dan Patch Days

Hello, I have a new layout to share today! I started with this sketch from Sketches in Thyme:

I flipped the sketch since my daughter was facing the right in all of my small photos. I also used two photos instead of one for the large photo. I used papers from one of the kits from the Scraproom for September along with a very old sheet of patterned paper from my stash (copyright 2006 😱). I cut all of the patterned paper pieces and adhered them to my page. For my title, I used a font that had a rectangle around the letters. I wanted the letters to have a longer tab at the bottom, so I added and welded a small rectangle to the bottom of each letter. I attached the letters to my layout and added the small letter stickers to complete the title. The letters were blending in a bit with the background paper, so I outlined them with a matching pen. I then added some stitching with my sewing machine (which did not go smoothly). I didn't want to cover up the cute heart paper at the bottom any more, so I used vellum for my journaling. I stamped the lines and heat embossed them so they wouldn't smudge. I added some stamped splatters around the page and then added some watered down ink splatters as well over the top. To finish off the page, I used some stickers, puffy stickers and flair buttons. 

I am also entering this in the Lasting Memories Thankful for stamps and stickers challenge since I used a few of each on this layout.
 

Tuesday, September 5, 2023

Happy 4

Hello, I have a new layout to share! I started with this sketch from Rochelle Spears:

I used the sketch for my left hand page. For the pattern on the bottom half, I used patterned acetate. I placed a patterned paper strip across the top and then sewed it onto my cardstock background (using my sewing machine) to create pockets to hold the cards my son received at his party. I cut the large circle from patterned paper and adhered that to the front of the pocket. For the title, I used banner stickers and cut the "4" using my Cricut. I used some die cuts, an epoxy flair, enamel dots and puffy stickers to embellish my page. I realized as I was starting this post that I hadn't journaled on this layout! I ended up adding it to the green flag on the large circle. 

I was also inspired by the Tic Tac Toe challenge from Scrap with Stacy:
I did the top row: stripes, banner, and enamel dots. Thanks for stopping by to check out my layout!


Thursday, March 26, 2020

April Calendar Page

Hello, I have one more layout to share tonight. I completed my April calandar layout! I started with the double page sketch from Stick It Down:


I stuck pretty close to the sketch this month, just adjusting the shapes/sizes of the photos from what was suggested. I decided to make this page springy, even though we don't really see spring around here until May. I found some chipboard tulips and cut the red and yellow layered flowers using my Cricut (for the Bitten by the Bug 2 spring challenge). For some added texture, I penciled in some stems for my flowers and then stitched them with embroidery floss (for the texture challenge at Lasting Memories). I stamped the leaves and used silver Nuvo drops for the flower centers to finish off the flowers. The P and L in the title were actually orange, but the color was not working with my papers, so I peeled off the top layer and then traced the letters onto coordinating patterned paper. I glued the paper onto the chipboard pieces and sanded the edges to make it look like that's how they were made. I had more journaling than my card could hold, so I let it spill onto the page below. I finished off my page with some fussy cut butterflies with Stickles covered bodies and Nuvo Drop trails. (In case you are wondering, we using a charcoal mask product on our faces in the top left photo on the right hand page. ;))

Thursday, May 17, 2018

June Calendar Page- Stick It Down

Hi all, I have a new layout that I've been working on for a few days to share! I got my June page done early this month since I had the photos ready. I once again used the Stick it Down double sketch:

I was also inspired by the Pinspired challenge at Paper Issues:
No automatic alt text available.


I started with white cardstock and used a mask and some yellow mist to make my background. Then I found some patterned papers to go with the colors from the inspirations piece. I layered my photos over that. I had some trouble coming up with something big to layer on the left side and ultimately decided to hand stitch a flower I cut the title using my Cricut and then outlined it in black to make it stand out on the layout. I finished off the layout with embellishments from various collections. I am trying to use the ephemera I have kept, so I layered my race number behind the photo from the 5k I did. 

I am also linking up with The Studio Stencils and Masks challenge.

Monday, May 22, 2017

June Calendar Page

Hello! I'm here to share my June calendar page and I even finished it early! I started with the two page sketch from Stick It Down:


I stayed pretty true to the sketch, but I split a few of the photos in two to get more on the layout. I used a 6x6 paper pad for the patterned paper pieces. After I attached them, I used my sewing machine to zig zag stitch over each seam. The rest of the page was embellished using stamps! I pulled out several flower stamps, stamped them on white cardstock and fussy cut them. The title was stamped with Versamark ink and heat embossed before being fussy cut. I attached some of the flowers with foam adhesive to give them some dimension. I finished the flowers off with Liquid Pearl centers.

Materials:
Cardstock- American Crafts, Georgia Pacific, Bazzill
Patterned Papers- American Crafts
Stamps- Stampin Up, American Crafts, Autumn Leaves
Ink- Stampin Up, Ranger
Buttons- Oriental Trading 
Liquid Pearls- Ranger
Border Punch- Martha Stewart
Pens- Signo Uniball, GelWriter
Thread- Coats and Clark

Wednesday, May 17, 2017

Birthday Party- Creative Scrappers #306

Hello all! I had some time to do a layout this week! I started with this sketch from Creative Scrappers:


I decided to go with bright colors to go with the bright background of the photos. Black cardstock made it all stand out. I fussy cut the two frames from a sheet of patterned paper, as well as the circle with the heart and the circle with the flower. I used my Cricut to cut the big star. I pulled some stickers and chipboard to embellish the page. I decided the page needed a little something yet and used my sewing machine to add a white frame to finish of the page.

I was also inspired by the new Add It Up challenge at Paper Issues. The challenge was to use the points on the chart below and create a layout that totaled more than 100 points. I had 4 photos for 20 points, 1 sheet of cardstock for 5 points, 3 sheets of patterned paper for 15 points, 1 cut file for 5 points, 2 inks for 10 points, 2 different alpha stickers for 10 points, 1 tag (3), journaling (5), 4 chipboard pieces (12), 2 stickers (4), the date (1), 5 enamel dots (5), stitching (10), and stamping (10) for a total of 125 points.


Materials:
Cardstock, stamp- American Crafts
Patterned paper, die cuts, enamel dots- Simple Stories
Chipboard- Simple Stories, Project Life
Stickers- Simple Stories, Bo Bunny, Colorbok
Ink- EK Success, Heidi Swapp, Colorbox
Pnes- Sharpie, Signo Uniball
Thread- Coats and Clark
Cartridge- Doodlecharms

Wednesday, July 22, 2015

Stick It Down Double Page Guest Designer


 Hi all! I'm early this month completing my calendar layout because... I am guest designing at Stick It Down again! My June layout was chosen as a favorite, so I got to work with this sketch this month:


Here is what I came up with:

I was also inspired by the July 3rd Got Talent challenge at My Scraps and More which was to do hand stitching. I went a little crazy with it, in fact.  I stitched 5 large flowers on my page. I think the reason I rarely stitch on a page is because, when I do, I go all out and it takes HOURS. I am happy with the texture it added, although a lot of it ended up being covered. :( 

I used some very OLD letter stickers for my title. The font was so dainty, they got a bit lost against the background, so I outlined them with a blue pen. You can see some of my stitching below and one of my flower clusters.
And my second flower cluster and some more stitching.

Materials:
Cardstock- Bazzill
Patterned Paper, brads, and flair- October Afternoon
Stickers- October Afternoon, K and Co.
Flowers- Prima, Michaels
Pens- Zig and Sakura
Floss- DMC
Wood Veneer- American Crafts
Gelato- Faber Castell
Ink- Tattered Angels
Canvas- Prima

Friday, January 31, 2014

February Calendar Page

Hello!  I have been busy this week scrapping and have a few projects to share over the next few days.  First up is my calendar page for February.  I used sketch #300 from Nuts About Sketches: 


I actually REDUCED the area I used for photos from what is suggested on the sketch.  For whatever reason, February tends to be a light photo month for me, so I didn't have many photos to include.  

I used two different colored cardstock bases because I wanted the blue, but I only had one sheet of that color.  I also figured I would be covering most of the the left hand page so the color wouldn't matter much.  Audrey at My Scraps and More had posed the challenge to use a geometric pattern and an organic pattern on a layout.  I did this in a couple of ways.  I used a floral paper that I cut into squares and rectangles on the left hand page.  I see the gingham pattern on the bottom of the layout as a geometric.  I also used a flower cut to back my title.  


Materials:
Cardstock- Bazzill and American Crafts
Patterned Paper- Fancy Pants and Cosmo Cricket
Stickers- Heidi Grace and Fancy Pants
Felt- Fancy Pants
Chipboard- heidi Swapp
Tape- Bella Boulevard
Ink- Ranger- Tattered Angels
Glitter Glue- Ranger
Pen- Sharpie
Punch- Martha Stewart
Cartidges- Cindy Loo and Holiday Cakes
Thread- Coats and Clark


Monday, November 5, 2012

November Calendar Page- NAS #234

It took me a couple of days into the month, but I finally got my calendar/ Project 12 page done! I used a Nuts About Sketches sketch that was posted early in October. I had a lot of fun playing with texture and making a homespun feel to the layout since most of the photos were from Thanksgiving.

I combined papers from a 6x6 paper pad by Jillibean Soup with some 12x12 papers from some other companies.  For the large circle in the center, I used my Cricut and the "Live Simply" cartridge.  I took the center circle and traced around it on scrap paper.  I then cut up the circle into wedges and then traced the wedges onto different patterned papers.  If you ever do this, I HIGHLY recommend numbering your pieces so you know what order to place them in the circle, otherwise you will have a very difficult puzzle to put together...

I wanted some larger red flower accents on may page, but I couldn't find any in my stash, so I ended up cutting my own from felt and then accenting them with orange fabric paint.

Materials
Cardstock- Bazzill, The Paper Company
Patterned Paper- Crate Paper- Jillibean Soup, Fancy Pants Designs, Die Cuts With a View
Die Cutter- Provo Craft
Cartridge- Live Simply
Stickers- October Afternoon, Karen Foster Designs, Little Yellow Bicycle
Spray Ink- Studio Calico
Ink- Ranger
Punches- Marvy, Martha Stewart, Tonic
Chipboard- Studio Calico
Tape- Target
Rub Ons- Fancy Pants, Pink Paislee
Fabric Paint- Duncan
Pen- Creative Memories
Button- Jesse James Co.
Ribbon- Stampin Up
Other- Felt, Thread

Wednesday, July 18, 2012

Little Miracle :)

I have a new layout to share, it is also a bit of an announcement. :)

 Yes, I am pregnant! These ultrasound pictures are from 7 weeks ago, I am due January 24th, 2013! I did this layout for a couple of challenges.

 The first was Challenge #2 for the My Scraps Got Talent contest.  The challenge was to use the sketch below and do some distressing.  I turned the sketch and added another photo.  For the distressing, I roughed up and inked some of my paper edges and spray and splattered some ink.
The other challenge was at Scrapping Everyday Miracles.  The prompt this month was "created beauty."  There is nothing more beautiful than new life, so I thought it was a good time to get these ultrasound images scrapped.  Here is a close up of my journaling so you can get a better idea of our journey to this pregnancy.

The other part of that challenge was to include some stitching on your layout.  I ran a zig zag stitch down the edge of my pink paper to tie it together with the other papers. For the two large hearts, I used embossed grungeboard that I first colored with white Distress stain and then inked with green and blue Distress Ink to accent the embossing.

Materials:
Cardstock- Bazzill
Patterned Paper- KI Memories, Creative Imaginations, Paper Adventures, Provo Craft
Punches- EK Success, McGill, Marvy
Paint- Ranger
Ink- Tsukineko, Ranger
Spray Ink- Studio Calico, Tattered Angels\
Rub ons- American Crafts, Colorbok
Die Cutter- Cricut
Cartridge- New Arrival
Sticker- American Crafts
Journal spot- Jillibean Soup
Pens- Sharpie, Marvy
Grungeboard- Advantus
Tags- EK Success

Thursday, October 20, 2011

My Little Gnomes

I haven't been doing a lot of scrapbooking lately because I was working on Halloween costumes for my girls. When the costumes were put out on the shelves at Target, I spotted this one and asked Addy if she wanted to be a gnome for Halloween. She immediately agreed. I thought I could make a costume for less than the $20 price tag on this one, so we took a trip to JoAnn's and bought the supplies- green and pink felt, green and pink thread (the most expensive part!), some elastic, Stitch Witchery, and ribbon. We also hit the thrift store in search of some plaid shirts. I couldn't find long sleeved ones, but I figured they could wear a long sleeved t-shirt under these if it is cold. I spent a couple of nap times sewing and then using the Stitch Witchery and an iron to attach the flowers. I couldn't find suspenders so I just used some ribbon and safety pins to make theirs. Here are the costumes:


I should mention I didn't use a pattern for the skirts or hats, I did a Google search and was able to find directions on how to make both- for FREE! I found the directions for the skirt here and the directions for the hat here.