These two cards were put together fairly quickly and were inspired by product. For the first card, I pulled out a snowflake stamp set and covered the card in snowflakes, stamped in Versamark Dazzle and light blue ink. I stamped the sentiment and decided the card needed a bit more. I cut the ornaments with my Cricut and the Holiday Cakes cartridge. I cut one layer in blue and the other in gray. All the gray areas I covered in Platinum Stickles to add some shine. To finish it off, I made lines with the platinum Stickles (which are not as straight as I would like them to be).
My second card is a card for my brother-in-law on his birthday. I bought this gear embossing folder a few weeks ago and had been looking forward to using it. I covered a piece of cardstock with aluminum foil and then ran it through my embossing machine. To add some color, I dropped red, yellow, and silver alcohol inks on the panel. I blended them a bit with an ink blending tool and let it dry. I don't have any Cricut cartridges with gears, so I used the wheels from the tractor on "Boys Will Be Boys" instead. I stamped my sentiment on the larger one and heat embossed it. I rubbed the edges of both "gears" with Versamark and then heat embossed them with silver to make them fit in with the background better. I used a screw head bread on the smaller gear to finish it off.
Friday, December 26, 2014
Thursday, December 25, 2014
Baptism Card- Sketch Saturday #340
Merry Christmas! I am back today with a baptism card I created for a friend's little one. I used this week's Sketch Saturday sketch:
To create the ombre effect on the background of my card, I sprayed the piece of cardstock with three different colors of spray mist. I wasn't happy with the blotchiness of it, so I then drug a card across the panel starting with the light colors and going to the dark. That was what I was looking for! The bible image and sentiment are stamped and heat embossed. I inked the edges of the piece with the bible. A length of ribbon and a brad finished off this card.
Wednesday, December 24, 2014
Bachelorette card- CAS(E) this Sketch #104
Well, it's time to catch up! Let me start by saying Merry Christmas Eve Day! It has been a crazy month around here with not a lot of paper crafting happening. I have made a few cards which I will share over the next few days. First up is a Bachelorette party card I made for my future sister-in-law using CAS(E) this Sketch #104:
I decided to go with the soft, feminine colors and patterns of Basic Grey Porcelain for this card. I layered up a few pieces of patterned paper. I colored the flowers to match using spray ink and topped them off with a button.
Stay tuned for some more cards over the next few days!
Sunday, December 7, 2014
Happy 8th Birthday!
Friday was my oldest daughter's 8th birthday! I can't believe it has be 8 years since she was born! For her card, I used this week's sketch at CAS(E) This Sketch:
I started by embossing a white panel for the base of my card front. I cut butterflies using my Cricut and the Storybook cartridge from a rainbow of colors. To make the sentiment stand out but not cover up the embossing, I used some vellum with colored flecks in it. I used light pink ink and iridescent embossing powder for the sentiment. I then arrange my butterflies in the rainbow on the card front.
I wanted to add the frame detail, so I turned to my glitter glue. I started with my clear iridescent Wow! glitter glue. I have had trouble getting the glue to come out of that tube since the day I bought it. I shoved a pin in the tip, pulled off the tip to see if I could see what was clogging it. Nothing worked. Finally, I just decided to squeeze. And. it. exploded. EVERYWHERE. I had it on my clothes, the desk, the carpet. Ugh. So I got that cleaned up. Word to the wise: if you are looking to buy glitter glue, just buy the Stickles. I have never had a problem with them and they are beautiful. That's what I ended up using here, Platinum Stickles. I don't love how that turned out, but oh well, it's done. :)
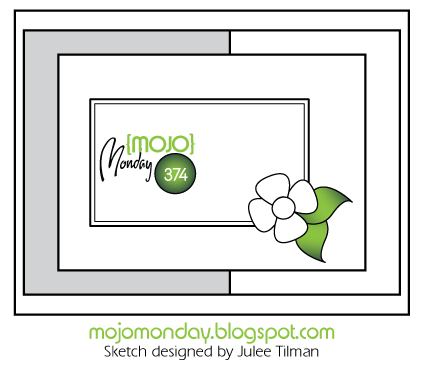
First Birthday- Mojo Monday 374
Hi, I'm back today with a card to share. I based it on this week's sketch at Mojo Monday:
I pulled out a fishy Stampin Up set for this card. I stamped it in navy blue ink and colored it in using colored pencils.
I also tried a new technique and, I am happy to say, it worked! After I finished coloring my fish, I decided I wanted it to be shiny. I colored over it with my Versamark pen and then sprinkled clear embossing powder on it. I heated the powder and viola! a shiny fish! (And another used for the Versamark pen.)
Friday, December 5, 2014
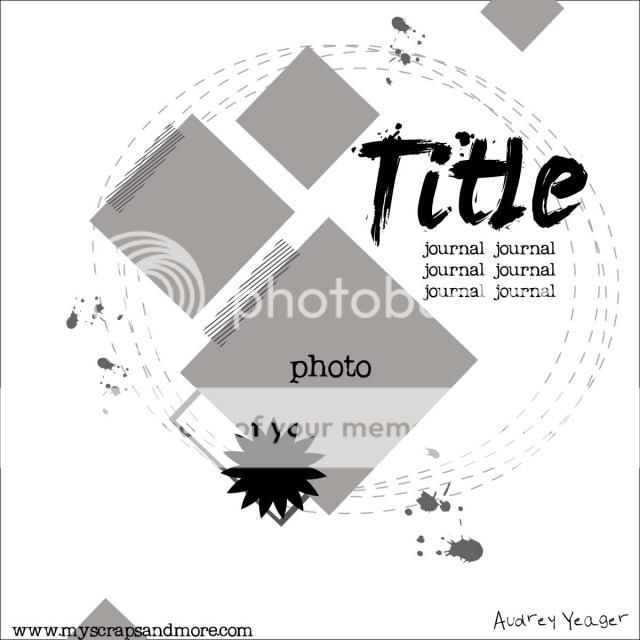
My Do It- My Scrap and More Sketch #95
It's the first Friday of the month, which means a new sketch at My Scraps and More! This week's sketch is brought to us by Audrey Yeager:
As you can see, I stuck pretty close to the sketch. I added another photo, and reduced the angle a bit. most of the papers and embellishments are from the Scrapbook Circle kit I received several months ago. This layout came together so quickly! I think the combination of the fun sketch and the already coordinated elements in the kit really helped. I debated what colors to go with because there are A LOT of different colors going on in the photos. I am really glad I settled on the pink, black and white color scheme because it doesn't compete with all the other color going on.
Materials:
Patterned paper- Bella Blvd., American Crafts, Echo Park
Vellum- Crate paper
Transparencies- Heidi Swapp
Photo Corner- Webster's Pages
Tape- K and Company
Pearl- Michaels
Pen- Newell Rubbermaid
Stamp- Stampin Up
Ink- Clearsnap
Embossing Powder- JoAnn Crafts
Software- Adobe, Crafters Edge
Photoshop Action- Coffeeshop Blog
Font- Anke Hand
Die Cutter- Provo Craft
Labels:
Cricut,
layout,
My Scraps and More sketches,
sketches,
stamping
Monday, December 1, 2014
December calendar page
Hey, my calendar page is done on the 1st! I'm not going to say much about it, I have so much other stuff to do, but here is the sketch from Stick it Down:
And here is my layout:
Some close ups of my clusters:
I hope you all had a wonderful Thanksgiving and have had a blessed start to the Advent season!
Materials:
Cardstock- American Crafts
Patterned Paper- Michaels
Chipboard- Making Memories
Ink- October Afternoon, Imaginisce, and Studio Calico
Die Cuts, Tin Pin, and Rub ons- October Afternoon
Brads- Basic Grey
Pen- Sakura
Tape- Pink Fresh Studio
Die Cutter- Provo Craft
Software- Crafters Edge
Font- Backhand Brush
Labels:
calendar,
Cricut,
Project 12,
sketches,
two page layout
Subscribe to:
Posts (Atom)