Sunday, April 29, 2018

Happy Birthday Cards- Alcohol Ink LIft

Hello again! I have a couple of cards and a technique to share today. For my cards, I started with last week's sketch from CAS(E) this Sketch:


I decided to try the alcohol ink lifting technique that Jennifer McGuire demonstrated here.  I started by making stripes across some pieces of vellum using a felt piece on an inking tool. The card on the left had a freshly inked pad, the one on the right had been swiped a few times so the colors are not as saturated. I used a part of a stencil and a foam blending pad with some Blending Solution to lift some of the color from the cards. I had to redo one of the cards a couple of times because I put too much blending solution on the pad and it kept squishing underneath the mask and messing up my colors. After it was dried, I decided I wanted my masked area to stand out more, so I laid the mask back over it and outlined the lifted areas with a fine tip Sharpie. I stamped and heat embossed a flower on coordinating cardstock and did the same with the sentiment. I finished off the card with some dots of Stickles. 


Saturday, April 28, 2018

May Calendar Page- Stick It Down

Hello and welcome to the weekend! I have my calendar layout ready to share today (3 days early!). I started with this sketch from Stick It Down:


I played around with the size and orientation of the photos, but stuck pretty close to the sketch. I started by spraying and splattering some coordinating spray inks on my background cardstock. Then I added my pattenerd paper and photos. I decided to journal directly on my background since I had the space on the bottom of my layout and didn't want to cover the spraying. I finished things off by fussy cutting some flowers and butterflies from patterned paper and embellished with some brads, pearls and enamel dots.

Saturday, April 21, 2018

Zoo Life- Stick It Down

Hello all! I have another layout to share. For this layout, I started with the single page sketch from Stick It Down:


I used packaging and smooshed some mist onto the background cardstock and then layered on my photos and patterned paper pieces. I had started with jsut the strips down the left side and the photos, but then I found the two cards that worked with the theme and added those. Then I remembered that one of the challenges at Paper Issues this month is to add layers, so I added more patterned paper layers on the right side. I fussy cut some animals from a sheet of pattened paper and added those with some foam tape along with a couple of stickers. I used my Cricut to cut the title and journaled directly on my background paper to finish off the layout.

Wednesday, April 18, 2018

Always Look on the Bright Side

Hello and welcome! I have a new layout to share today! This was a group of photos that was very intimidating for me so I've been flipping past them for the past few months, I finally decided to tackle them using the quote from the current Paper Issues quote challenge:


Since these are all bright, outdoot shots, I thought the quote fit. Since there are so many photos, I decided to go with a grid for the design. I used patterned paper to tie the two pages together and cover the gap where my grid didn't quite line up. I had fun embellishing the open spaces in my grid with various embellishments. 


I am also entering this in the Lasting Memories Week 3 challenge: use at least 4 patterned papers.

Monday, April 16, 2018

22 Weeks- Sketches In Thyme

Hello all! I have a new layout to share! It is another one with ultrasound images. We are closing in on the end of this pregnancy, so I am trying to get the ultrasound images scrapped! I started with this sketch from Sketches In Thyme:


As I was pulling different collections from my stash that were gender neutral, I came across this older Fancy Pants collection and decided to use it. I like the rulers to signify the growth that is happening and there is a whole sheet of them in this collection! I stuck pretty close to the sketch on this one. I finished off the layout with embellishments from various collections and manufacturers. 


Thanks for stopping by and checking out my layout.

Sunday, April 15, 2018

Happy Birthday to You- Inspired by All the Little Things

Hello! I have one last card to share today! This time it is a birthday card who is celebrating her 2nd birthday today. I was inspired by the image at Inspired by All the Little Things:


I loved all the different flowers in the photo, so I decided to stamp a border of flowers across the bottom of my card. I then created a scene with a little girl holding a balloon. The girl was cut using the "Playtime" cartridge and the balloon was cut using "Stretch Your Imagination" cartridge. The balloon was cut from glossy cardstock and then colored using alcohol inks. To add some dimension and interest to the little girl, I used a scrap of tulle to create a skirt. I started by gluing it down. Once the glue was dry, I ran it through the sewing machine to flatten it a bit and make sure it stayed it place. 


Thanks for stopping by!

Saturday, April 14, 2018

Happy Birthday- Altenew Color Challenge

Good morning! I have another card to share today. This time I was inspired by the color challenge at Altenew:


I started with my rose stamp set and made roses across the bottom of my card using a few colors of purple. I decided the top needed more texture, so I pulled out a background stamp and inked it with the lightest purple color. I stamped it on another sheet of paper and then onto my card back to soften the color. I then inked the panel with the darkest purple color. For the sentiment, I stamped and heat embossed it on a piece of vellum and attached it to my card. I finished off the card with some spots of Diamond Stickles to add some sparkle and a little dimension.


Friday, April 13, 2018

First Communion Card- Stick It Down

Hello, I have a few cards that I will be sharing over the next few days! First up is a card inspired by this month's card sketch at Stick It Down:


I made a First Communion card for my son with this sketch. I used the "New Testament" Cricut cartridge for the chalice. After attaching my patterned paper, I realized that I wanted more texture on the background on the upper part of the card, so I used a couple of post its to mask the bottom and used a background stamp to add the plaid to the top. For the host, I used my Score Pal to create the cross. Both the chalice and the host were attached using foam tape. I stamped and heat embossed the sentiment on a scrap of cardstock and attached that to my card. I finished things off with some blue Liquid Pearls on the top edge of my patterned paper and gold Liquid Pearl accents on the chalice.


Saturday, April 7, 2018

April Calendar Page

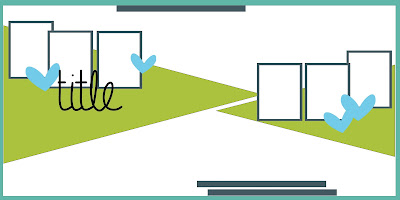
Hello! We are a week into April and I finally got my calendar layout done! I was inspired by this sketch from Even More Scrapping:


It is an older sketch that I found on Pinterest, but I thought it was fun and I loved how many photos could go on it! I stuck very close to the sketch. All of my journaling for this page ended up being the descriptions for my photos. The papers and stickers are all from the same collection, which made putting this together pretty quick and easy. I just added some buttons and rub ons. For my title, I used some DIY Thickers and glitter and stamps. 

Thanks for stopping by to check out my layout!

Wednesday, April 4, 2018

Smile It's Summer

Ha, I wish! I'm going to pretend that there isn't nearly a foot of fresh snow outside my window while I write this. :)

The current challenge at Scrap Our Stash is to use the "Up" movie poster for inspiration:


I've been holding on to this October Afternoon cloud paper for a while and I thought this was the perfect time to pull it out and use it! I didn't want to cut my photos into circles or ovals, so I just rounded the corners to suggest the shape of balloons. I then found some coordinating patterned papers and cut them into circles and ovals to add around my photos. I found the wood veneer piece and inked it to go with the colors I was using and stamped the rest of the title. To continue to illusion of balloons, I used some white embroidering floss to make strings on my balloons. I finished of the page with a stitched border, journaling, stickers, wood veneer pieces and enamel dots.