Saturday, September 27, 2014

Card Catch Up

Sorry, I've kind of fallen off the map this month. I guess I just haven't wanted to spend the time to post my stuff on the blog.  Well,  Here I am, catching up with a few of the cards I made this month. 

First up is the card I made for my husband's birthday earlier this month.  I used Case this Sketch #92:

I played a bit with my collection of pennant stamps and Distress Inks to make this masculine card.

Next up is a baptism card for my nephew.  The background is watercolor paper that was dry embossed. I rubbed Gelatos over it, sprayed it with water, and then ran a brush down the page to spread the color.  I stamped and heat embossed the banner.  I finished it off by blending Salty Ocean Distress Ink onto the banner.

Last is a thank you card.  This was from a group, so I used a full sheet of paper folded in half to give everyone space to write inside it. For the background, I stamped and heat embossed the "gratitude" definition stamp.  I stamped over that with light pink ink and a "paint print" flower stamp. I created the banners with some patterned paper and a punch.  I fussy cut one of the circles and popped it up with foam tape for dimension. I finished it off with a stamped sentiment and some twine.

Friday, September 26, 2014

Christmas Joy

Hello all!  I have a two page layout to share today that took a while to complete.  It was one of those pages that just wasn't inspiring me and I didn't know what to do with it.  I do like what I eventually came up with!

I was inspired by the 9/15 Mix It Up Monday challenge at My Scraps and More.  The challenge was to use scallops, washi tape, and twine.  I used all three of them together on the left page, but you can find the tape and scallops other places on the layout as well.

I couldn't remember what my thought was when I printed my photos (or if I even had one) as far as how to lay them out, but I ultimately decided to take the larger highlight photos and showcase them on the left and put the smaller photos of our various celebrations on the right.


I did a lot of fussy cutting for my embellishments.  Some of the paper already had glitter accents, however, I added the glitter to the heart below. I also used some Prima canvas pieces to decorate my page.

I mixed some chipboard and rub ons for my title.  I also did some more fussy cutting.  I cut some of the scallops from the matching sheet of paper and popped them up with foam adhesive.

 Materials:
Cardstock- American Crafts
Patterned Paper- Michaels
Trim- Pink Paislee
Chipboard- Making Memories
Brads- Bo Bunny
Stickers- October Afternoon, EK Success
Canvas- Prima
Ink- Ranger, Tattered Angels, Creative Imaginations
Pen- Stampin Up
Glitter Glue- Ranger, American Crafts
Rub Ons- Daisy D's
Tape- My Mind's Eye


Twine- Target

Friday, September 19, 2014

The Piggy Bank Story- My Scrap and More Sketch #91

It's the 3rd Friday of the month, which means a new sketch at My Scraps and More!  This week, we have this fun sketch by Nadine:


I decided to scrap the story of how I had to paint this piggy bank for my daughter twice because the first one broke in the kiln.  I realized while I was pulling papers for this layout that my supply of brightly colored patterned paper in dwindling!  Everything on this page is scraps!


For the circles, I used my large Creative Memories circle cutter as a template and drew around it with a pencil.  Then I took the pump from my purple Glimmer Mist and drew the circle with that and added some splatters.  Once that was dry, I erased the pencil.  I decided I wanted a little more dimension so I pulled out some purple dimensional paint and made some circles and splatters with that as well.

I was also inspired by the 9/1 Mix It Up Monday challenge on the boards.  The challenge was to use at least 5 patterned papers, do some fussy cutting and some paper tearing.  I fussy cut my star embellishments and tore the edge of the bright green patterned paper  on the left side of the layout.

Make sure you head over to the My Scraps and More Sketch blog and check out what the rest of the team did!

Materials- 
Cardstock- Bazzill
Patterned Paper- Bella Blvd., Bo Bunny Press, Echo Park, Fancy Pants, Heidi Swapp
Stickers- Bo Bunny
Ink- Tsukineko, Tattered Angels
Pe- newell Rubbermaid
Paint- Duncan
Embossing Powder- JoAnn Crafts
Stamp- Stampin Up
Glitter Glue- Ranger
Font- Cheeseburger
Software- Sure Cuts A Lot

Tuesday, September 9, 2014

Stick It Down Guest Designer!

Hello, I have an exciting post today!  Last month my card was chosen as the favorite at Stick it Down, so I was asked to be a guest designer for their card sketch this month. Here is the sketch:


I had a birthday card to make for my 17-year-old niece, so this is what I made:


I started with the polka dot paper and chose colors from there.I chose two patterned papers and a vellum for the balloons.  I did a bit of shading on the balloons with water color pencils.I stamped and heat embossed the sentiment on the banner.  I inked the edges of all of the base pieces and then attached them.  I layered the balloons, popping up the green one with foam adhesive. I finished the card off by running a line of glue where I wanted my twine to lay.  

Make sure you head over to Stick it Down and check out what the design team did with the sketch!

Saturday, September 6, 2014

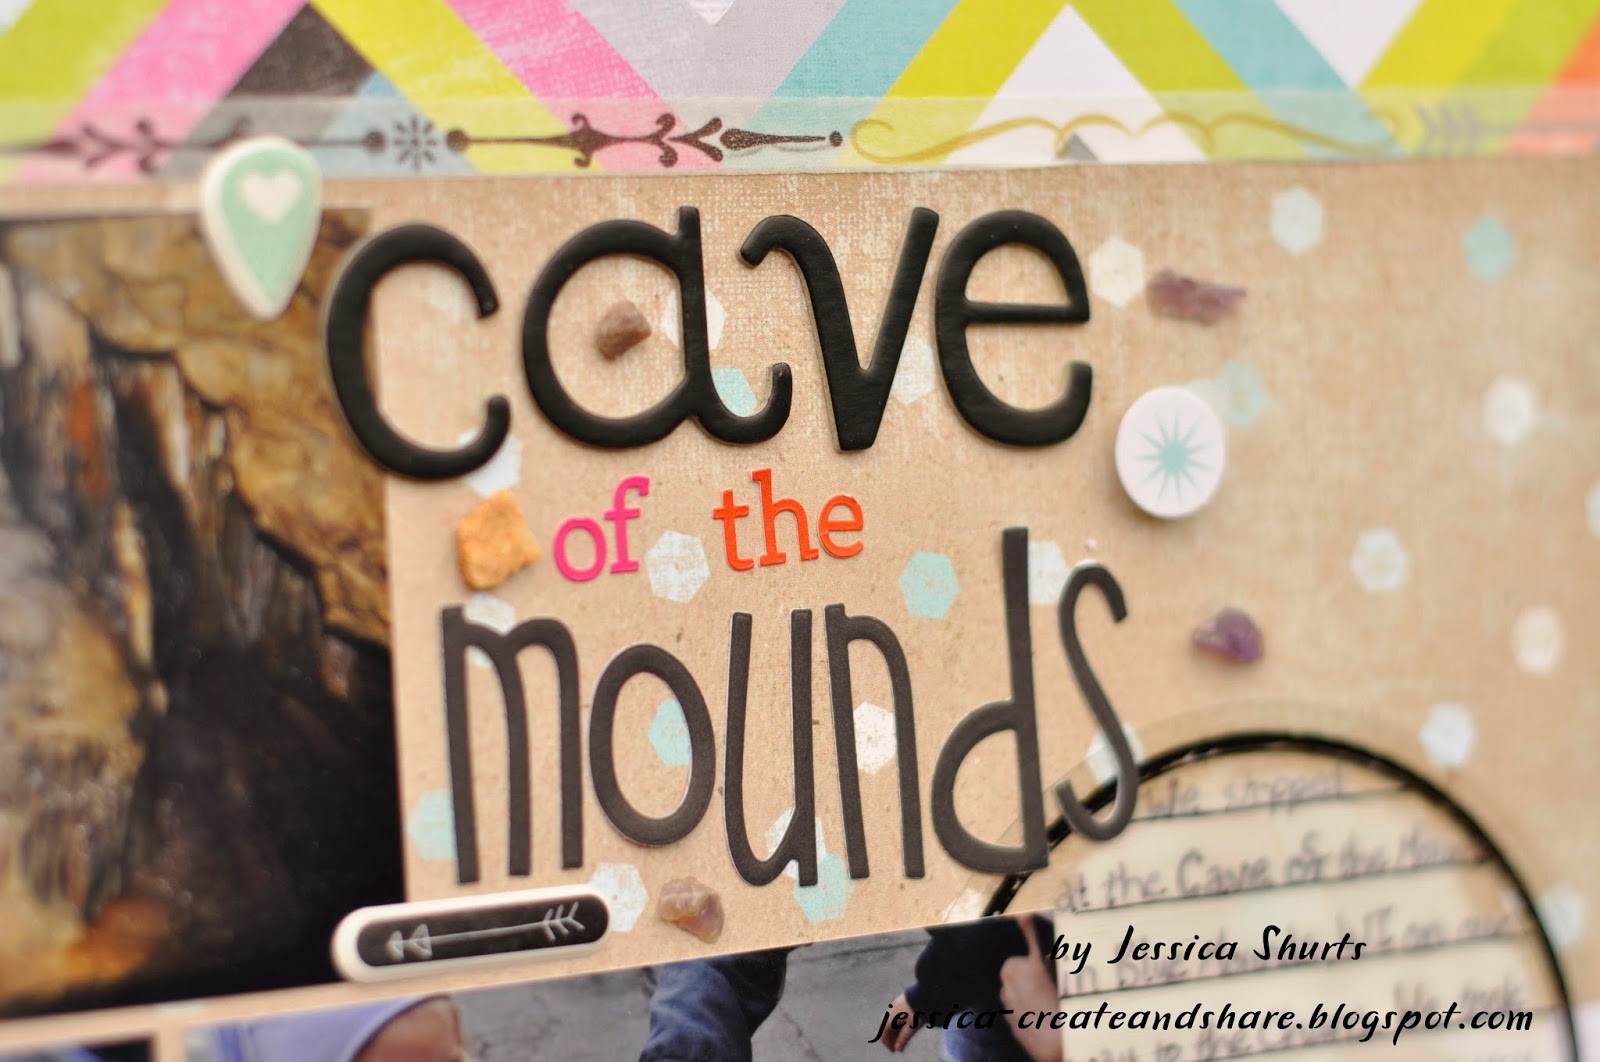
Cave of the Mounds

 I made this layout early in August and then entered it in the state fair.  I wasn't happy with the photos I took of it before I dropped it off, so I waited until I got it back to rephotograph it and post it. :)

The 8/5 challenge at My Scraps and More was to make embellishment using stamps.  I used the Scrapbook Circle kit I won a couple of months ago.  The kit included a fun arrow stamp.  I stamped that on green paper and heat embossed it in black.  There was also a date stamp with which I did the same.

To add some texture to the bottom of my layout, I used some texture paste, that I had colored with spray ink, and my rock mask.


I used various embellishments included in the kit and cut some words from one of the sheets of paper.  I wanted to add something different to my page and I ended up hunting down the bag of rocks from the gemstone panning we did while we were at the cave and I attached several of the smallest chips around my embellishment clusters.

I used a couple of different letter stickers for the title.  To make the journaling stand out from my background, I smeared some white paint on the back of my transparent journaling spot.
Oh, in case you were wondering, I did not win any ribbons with this layout. :(  Judging by what did receive ribbons and the feedback I received, my style is a little different than what they are looking for...

Materials:
Cardstock- American Crafts
Patterned Paper- Heidi Swapp
Chipboard- KI Memories
Modeling Paste- Golden
Inks- Clearsnap, October Afternoon
Paint- Liquitex
Pen- Newell Rubbermaid
Stickers- Basic Grey, Bella Blvd, American Crafts, Simple Stories
Tape- My Mind's Eye
Transparency and Die Cuts- Heidi Swapp
Journal Spot- Michael's
Embossing Powder- JoAnn Crafts
Stamps- Scrapbook Circle
Photo Corners- Webster's Pages


Friday, September 5, 2014

Anniversary Card- Retrosketches #130

Hello!  I'm back with a card I made last night. I used this sketch from Retro Sketches:

The strips on my card are washi tape.  I then stamped and heat embossed the flowers on the right side of the card.  For the sentiment, I cut it out with my Cricut and then covered in with Versamark ink and silver embossing powder. I've really been enjoing playing with embossing powder lately!


First Haircut: My Scraps and More Sketch #90

Hi all!  Happy Friday to you!  This past week, I saw three of my four children off for their first days of school.  Needless to say, it has been busy around here! I did get a little scrapping time in early in the week and I worked with this great sketch by Audrey:

Getting going on this layout took a while because I spent way too much time looking for the hair I saved from this haircut.  Unfortunately, it never turned up. :(  This is the kid who is missing his certificate from the hospital with his footprints on it.  I'm feeling a little guilty here...

Anyway, here is what I came up with.  The 8/19 challenge on the boards was to choose at least 3 patterned papers and use them to fill holes left by die cuts.  I cut 5 of the circle on this layout out of the blue polka dot paper.  I attached the patterned paper to the yellow cardstock background.  To give the blue paper some lift, I used some chipboard around the edges and a few spots in the middle (instead of foam tape, it's cheaper!).  


You can see in the photo above, the lift is pretty subtle, but adds a bit of dimension.  I added some more dimension with my embellishments. 
I cut the word "haircut" with my Cricut and Sure Cuts A Lot. The banner border across the bottom is Heidi Swapp and I colored it using Distress Inks.  I turned out a little darker than I had planned, but I think it looks okay anyway.

Materials:
Cardstock- American Crafts
 Patterned Paper- October Afternoon
Stickers- October Afternoon, Simple Stories
Borders- Bazzill, Heidi Swapp
Ink- Ranger, Clearsnap, Studio Calico
Circle Cutter- Creative Memories
Pen- Newell Rubbermaid
Brads- October Afternoon, Echo Park
Tape- My Mind's Eye, Bella Blvd.
Wood Veneer- Studio Calico
Cardboard- Jillibean Soup
Stamp- American Crafts
Font- Crazy Harold

Monday, September 1, 2014

Another Wedding Card- CAS(E) this Sketch #90

I have another wedding card to share, this time for our old babysitter who got married a few weeks ago.  I again used a sketch from CASE(E) this Sketch:


My background was inspired by some of the things Jennifer McGuire has been doing lately on her blog. Seriously, if you are into stamping, you need to follow her!  I started by stamping my background (which is watercolor paper) with a flower stamp in VersaMark ink. Then I heat embossed it with a iridescent glitter powder.  I took my ink blending tool and rubbed some Wild Honey Distress ink over the middles of my flowers.  I then misted the paper with plain water.  I took a paint brush and used it to pick up Picked Raspberry Distress ink from the pad and added it to the outer edges of the flowers.  I also used it to pick up some Walnut Stain Distress ink to add some depth to the flower centers.  While that dried, I cut out the bride and groom with my Cricut.  I also stamped the sentiment on another piece of watercolor paper and inked it with the same colors.I finished off the card by inking the edges of my watercolor paper pieces to tie them into the silhouettes.