Monday, December 29, 2014

Happy Birthday- Cardabilities #113

Hello! I hope you all had a wonderful Christmas!  I have a couple of cards to share today.  First up is a birthday card I created for my brother-in-law using this sketch from Cardabilities:

I pulled out my gear embossing folder and embossed a piece of yellow cardstock. I inked it using an ink blending tool and Forest Moss, Wild Honey, and Weathered Wood Distress Inks.  I then splattered some Sugar Maple Glimmer Mist on it.  To make the gears, I cut the tractor tires using my Cricut from the Boys Will be Boys cartridge.  The clock face was cut with the Edge to Edge cartridge. I stamped a texture stamp and heat embossed the gears before attaching them to the card. A couple of brads and a length of ribbon finished off the card.


I also made a wedding card this weekend for my husband's brother and his new wife. I used the Edge to Edge cartridge for the white cut background (I really love how this one looks against the black). The bracket was cut from vellum using the Storybook cartridge.  I cut the bell with the Stretch Your Imagination cartridge.  I added some sparkle to the bell using Platinum Stickles. The sentiment was stamped and heat embosssed with silver embossing powder.


Friday, December 26, 2014

A Couple more quick cards...

These two cards were put together fairly quickly and were inspired by product.  For the first card, I pulled out a snowflake stamp set and covered the card in snowflakes, stamped in Versamark Dazzle and light blue ink.  I stamped the sentiment and decided the card needed a bit more.  I cut the ornaments with my Cricut and the Holiday Cakes cartridge.  I cut one layer in blue and the other in gray.  All the gray areas I covered in Platinum Stickles to add some shine. To finish it off, I made lines with the platinum Stickles (which are not as straight as I would like them to be).


My second card is a card for my brother-in-law on his birthday.  I bought this gear embossing folder a few weeks ago and had been looking forward to using it.  I covered a piece of cardstock with aluminum foil and then ran it through my embossing machine.  To add some color, I dropped red, yellow, and silver alcohol inks on the panel.  I blended them a bit with an ink blending tool and let it dry. I don't have any Cricut cartridges with gears, so I used the wheels from the tractor on "Boys Will Be Boys" instead. I stamped my sentiment on the larger one and heat embossed it.  I rubbed the edges of both "gears" with Versamark and then heat embossed them with silver to make them fit in with the background better.  I used a screw head bread on the smaller gear to finish it off.

Thursday, December 25, 2014

Baptism Card- Sketch Saturday #340

Merry Christmas!  I am back today with a baptism card I created for a friend's little one.  I used this week's Sketch Saturday sketch:

To create the ombre effect on the background of my card, I sprayed the piece of cardstock with three different colors of spray mist.  I wasn't happy with the blotchiness of it, so I then drug a card across the panel starting with the light colors and going to the dark. That was what I was looking for! The bible image and sentiment are stamped and heat embossed.  I inked the edges of the piece with the bible.  A length of ribbon and a brad finished off this card.


Wednesday, December 24, 2014

Bachelorette card- CAS(E) this Sketch #104

Well, it's time to catch up! Let me start by saying Merry Christmas Eve Day!  It has been a crazy month around here with not a lot of paper crafting happening. I have made a few cards which I will share over the next few days. First up is a Bachelorette party card I made for my future sister-in-law using CAS(E) this Sketch #104:


I decided to go with the soft, feminine colors and patterns of Basic Grey Porcelain for this card. I layered up a few pieces of patterned paper.  I colored the flowers to match using spray ink and topped them off with a button.


Stay tuned for some more cards over the next few days!

Sunday, December 7, 2014

Happy 8th Birthday!

Friday was my oldest daughter's 8th birthday!  I can't believe it has be 8 years since she was born! For her card, I used this week's sketch at CAS(E) This Sketch:


I started by embossing a white panel for the base of my card front.  I cut butterflies using my Cricut and the Storybook cartridge from a rainbow of colors.  To make the sentiment stand out but not cover up the embossing, I used some vellum with colored flecks in it. I used light pink ink and iridescent embossing powder for the sentiment. I then arrange my butterflies in the rainbow on the card front. 
I wanted to add the frame detail, so I turned to my glitter glue.  I started with my clear iridescent Wow! glitter glue.  I have had trouble getting the glue to come out of that tube since the day I bought it.  I shoved a pin in the tip, pulled off the tip to see if I could see what was clogging it.  Nothing worked.  Finally, I just decided to squeeze.  And. it. exploded. EVERYWHERE. I had it on my clothes, the desk, the carpet. Ugh. So I got that cleaned up. Word to the wise: if you are looking to buy glitter glue, just buy the Stickles. I have never had a problem with them and they are beautiful. That's what I ended up using here, Platinum Stickles.  I don't love how that turned out, but oh well, it's done. :)

First Birthday- Mojo Monday 374

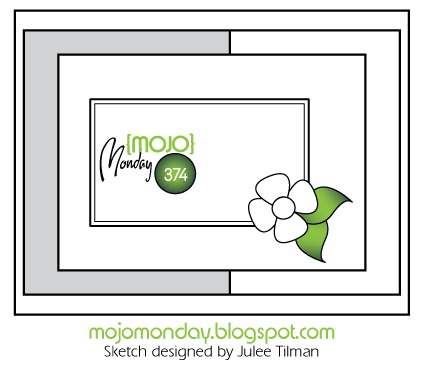
Hi, I'm back today with a card to share.  I based it on this week's sketch at Mojo Monday:


 I pulled out a fishy Stampin Up set for this card. I stamped it in navy blue ink and colored it in using colored pencils.

I also tried a new technique and, I am happy to say, it worked! After I finished coloring my fish, I decided I wanted it to be shiny.  I colored over it with my Versamark pen and then sprinkled clear embossing powder on it.  I heated the powder and viola! a shiny fish! (And another used for the Versamark pen.)


Friday, December 5, 2014

My Do It- My Scrap and More Sketch #95

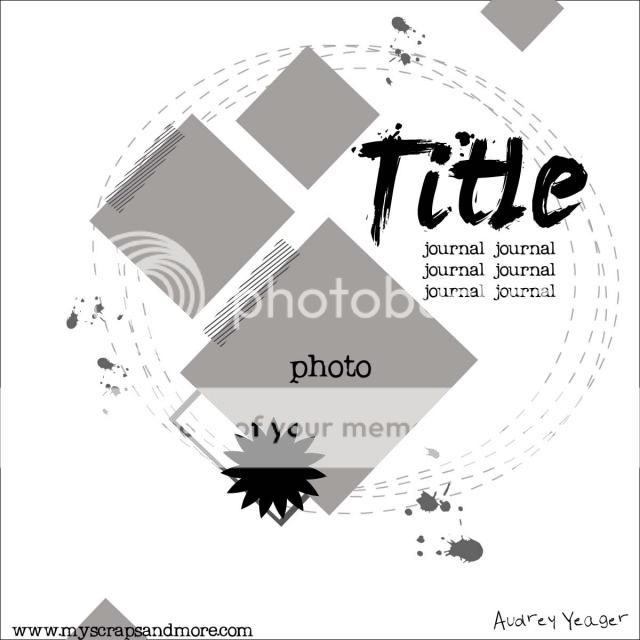
It's the first Friday of the month, which means a new sketch at My Scraps and More! This week's sketch is brought to us by Audrey Yeager:

As you can see, I stuck pretty close to the sketch.  I added another photo, and reduced the angle a bit. most of the papers and embellishments are from the Scrapbook Circle kit I received several months ago. This layout came together so quickly! I think the combination of the fun sketch and the already coordinated elements in the kit really helped.  I debated what colors to go with because there are A LOT of different colors going on in the photos. I am really glad I settled on the pink, black and white color scheme because it doesn't compete with all the other color going on. 

Materials:
Patterned paper- Bella Blvd., American Crafts, Echo Park
Vellum- Crate paper
Transparencies- Heidi Swapp
Photo Corner- Webster's Pages
Tape- K and Company
Pearl- Michaels
Pen- Newell Rubbermaid
Stamp- Stampin Up
Ink- Clearsnap
Embossing Powder- JoAnn Crafts
Software- Adobe, Crafters Edge
Photoshop Action- Coffeeshop Blog
Font- Anke Hand
Die Cutter- Provo Craft

Monday, December 1, 2014

December calendar page

Hey, my calendar page is done on the 1st! I'm not going to say much about it, I have so much other stuff to do, but here is the sketch from Stick it Down:
And here is my layout:

Some close ups of my clusters:


 We finally got "Sure Cuts A Lot loaded onto our new computer, so I used that to cut my title.  I didn't like how the painting on the chipboard piece in the photo below turned out, so I covered it up with a tin pin (make it work!).

I hope you all had a wonderful Thanksgiving and have had a blessed start to the Advent season!

Materials:
Cardstock- American Crafts
Patterned Paper- Michaels
Chipboard- Making Memories
Ink- October Afternoon, Imaginisce, and Studio Calico
Die Cuts, Tin Pin, and Rub ons- October Afternoon
Brads- Basic Grey
Pen- Sakura
Tape- Pink Fresh Studio
Die Cutter- Provo Craft
Software- Crafters Edge
Font- Backhand Brush