Saturday, May 30, 2020

June Calendar Page

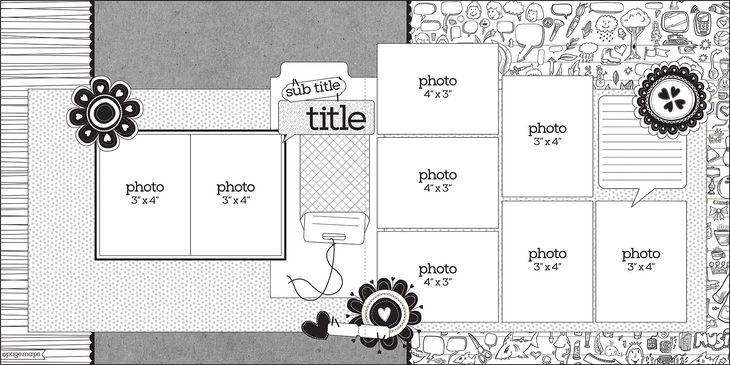
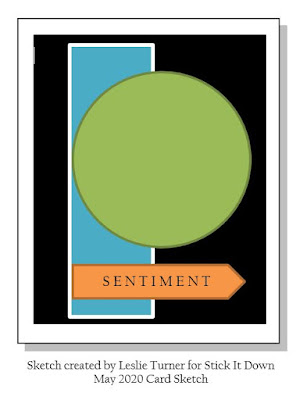
Hello, I have a new layout to share, my calendar layout for June! I was inspired by this sketch from Stick It Down:


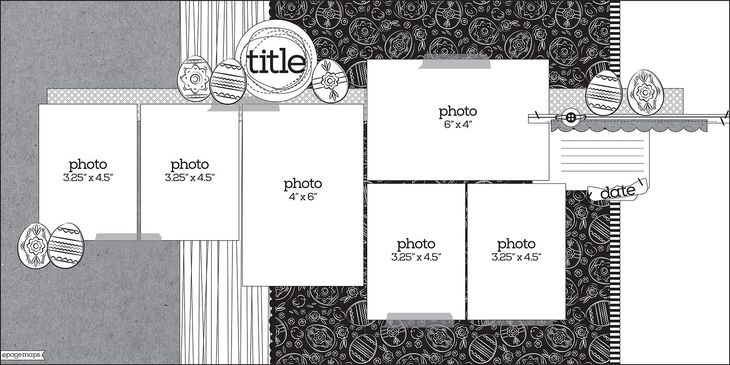
This was a fun sketch to work with and I was able to get lots of photos on my layout. I used some bright and colorful patterned papers for this summery layout. I debated using a brighter color for the background, but I really like how the black makes the colors pop even more! My title was cut using the Cricut. I fussy cut the flowers from patterned paper and made clusters of them around my layout. I finished things off with some enamel hearts and sequins.

Tuesday, May 26, 2020

Knighted

Hello! I have a new jam-packed layout to share! I was inspired by the tic tac toe challenge at The Studio Challenges:

I worked with the diagonal from the lower left to the upper right- ephemera (the certificate from the party), triangle (my big embellishment clusters for a triangle), and enamel dots. For this layout, I started with the certificate and four photos and played a bit with placement on my page. I settled on this placement and then chose a couple of patterned papers to add to the top and the bottom for some color and interest. For my title, I cut the word using my Cricut. Then I decided that I wanted to add a banner, so I cut that with the Cricut as well from shiny gold paper. I had some old chipboard and printed die cuts from Scrapfest several years ago that fit the theme, so I pulled those out and added the shield and laurel leaves to the embellishment clusters. I wrote the journaling directly on my layout. To add some interest to the stark black and white certificate, I took a water brush and a gold Gelato and painted in parts of the lions. A scattering of enamel dots and sequins finished off the page.

Sunday, May 24, 2020

All Bundled Up- Lasting Memories Guest Designer

Hello, today I am sharing my last layout for my month guest designing at Lasting Memories. Our 3 Things for week 4 are: geometric or icon paper, circles, and 3 or more photos.

I had lots of photos to work with again, so I headed back to Page Maps for a sketch: 


I adjusted the left page a bit to get all of my photos to fit, but otherwise followed the sketch pretty closely. I only had one sheet of that blue cardstock, so I ended up patching my page together a bit. The right hand page pieces are attached to a white cardstock base. The patterned paper and blue cardstock on the left page overlapped enough that I just adhered them together at the seam at left it. The red scalloped borders were actually one border sticker that I used my trimmer to cut in half. I stamped and heat embossed the snowflakes on the dark blue circles. I used one of the sticker sentiments from the collection I was using for a quick and easy title. To finish off the clusters around the page, I made dots of Liquid Pearls and Stickles.

I really enjoyed playing along with the challenges at Lasting Memories this month! I hope you had a chance to as well!

Saturday, May 23, 2020

Two Cards, One Challenge

Hello! I have two cards to share today! I was inspired by the current challenge at Fusion for these cards:


I loved the colors and watercolor effect of the inspiration image, so I started with that. I used Distress inks and a brush on watercolor paper. The colors weren't as rich as I wanted them to be, so I then pressed the inkpads onto a plastic surface and sprayed them with water before running by watercolor paper through the ink. Once it was dry, I stamped and heat embossed (with clear embossing powder) the swirls. I then sprayed the pieces with water and lifted some of the color off with a towel. I used some patterned acetate and patterned paper to accent the watercolored pieces. For the birthday card, I wanted to add some more so I stamped the present and party hat with the same colors of inks. I finished off the card fronts with glitter glue, washi tape, sequins and stamped and heat embossed sentiments. 


Thanks for stopping by to check out my cards!

Monday, May 18, 2020

Happy 2nd Birthday!

Hello! I have a new card to share today. I made this card for my youngest who turned two this weekend! I started with this sketch from Stick It Down:
 
I had the idea of making a "balloon" number 2 from vellum. I had cut the outline and vellum and then thought it would be fun to make it a shaker element! I traced the outline onto white craft foam and cut that out and attached it under the cardstock outline. Then I filled the number with sequins and beads and glued it to the light blue circle. Since the glue was wet, some of the sequins stuck in places, which keeps them from all falling to the bottom. I stamped and heat embossed the sentiment for finish off the card front!

Sunday, May 17, 2020

Little Brother- Lasting Memories Guest Designer

Hello! I have another layout to share as part of my time as guest designer at Lasting Memories. This week's "3 Things" were plaid/check/gingham paper, hearts, and tags. 

For my layout, I started with the plaid paper. To add some interest and texture behind my photos, I splattered and smooshed some inks . Then I stitched a giant heart on my background (it was hand drawn, so it isn't perfectly symmetrical. After attaching my photos, I started embellishing with tags, die cuts and rub ons. I used my Cricut to cut the word "Brother" and found some rub ons for the word "little." The word "little" was not standing out well against my background, so I went over it a few times with Cracked Pistachio Distress Stain to give the background some contrast (the rub on resisted the ink). The tassle on the balloon tag was the leftover thread from the stitching! I finished off the layout with some brads and and sprinkling of star sequins.


Sunday, May 10, 2020

May Calendar Page- Lasting Memories Guest Design Team

Welcome back! It is time for the Week 2 challenge at Lasting Memories. This week's "3 Things" are: striped patterned paper, stars and washi tape.

I used this challenge on my calendar layout for May. I also used the April sketch from Stick It Down


I used a large photo collage on the left hand page instead of a big photo and I stretched it across more of the page. I ran my title and journaling down the center of the layout. I made a few embellishment clusters around the page using stickers, rub ons, wood veneer stars, washi tape, and gem stars. 

Once again, I didn't have much left of my papers in this collection, so I made some cards to finish them off. Again, some stamping and simple embellishing is all these cards needed!


Make sure to check back next week for my next layout!

Saturday, May 9, 2020

Merry and Bright

Hello, I have a new layout to share! I started with a sketch from Page Maps that worked pretty well with the photos I had.


Then I turned to Scrap Our Stash for inspiration on how to embellish my page:

I used papers from a few different collections for this layout. I've had those big wood veneer ornaments for quite some time and it felt good to put them to use. Once I had my photos and papers stuck down, I went to work embellishing. I used some white and gold washi tape in a few places around the page. I then decided to back the ornaments with gold glitter paper to go with the washi tape. The title is a sticker that I put on a patterned paper circle and attached with some craft foam for dimension. I added a couple of brads and rub ons by the title and by the embellishment cluster in the lower right. I finished off all of the clusters with some green enamel dots and gold Liquid Pearls. 

Happy Mother's Day- Fusion Card Challenge

Hello again! I have a couple more cards to share today. I was inspired by the sketch part of the current challenge at Fusion:
I pulled out my MISTI and a Roundabout stamp to make these Mother's Day cards. I found four purplish colors and went to work stamping. I made 2 6x6 panels that I then cut in half and trimmed down to fit on my cards. I found some coordinating papers and added them to the bottome of the card. I stamped and fussy cut the individual flowers and attached them with foam tape and stamped and heat embossed the sentiment.

Monday, May 4, 2020

Cards- CAS(E) This Sketch

Hello, I have two cards to share. I was inspired by the current sketch at CAS(E) This Sketch:


I dug into my scraps and found some coordinating papers. I stamped the cat and house, colored them with water color pencils, and fussy cut them. After attaching the patterned papers and stamped the sentiments, I placed the house and cat on the blue part of the card. The blue felt a little plain, so I used a background stamp and VersaMark ink to add some interest to the background.

Sunday, May 3, 2020

5- Lasting Memories Guest Design Team

Hi all, I have some exciting news! I am one of the guest designers for Lasting Memories Scrapbook Challenges this month! The theme for May is "3 Things." Each week there will be a list of three items that you must include on a layout. This week's 3 things are: polka dots, flowers, and stickers.  

For my layout, I used my Cricut and a background cut to place behind my photo. I decided to try inlaying the polka dot paper, so I did the same cut from that paper and individually placed each piece on my layout. I really like the smooth effect it gives! I then layered over some patterned papers and stickers. I cut the big number "5" using my Cricut as well and attached ti with foam tape for some dimension. I fussy cut a bunch of flowers from patterned paper and used some enamel flowers as well. I finished off my layout with a sprinkle of sequins.


After finishing my layout, I once again didn't have much left of any of the papers, so I finished off this collection like I did with the kit I shared yesterday: by making cards! I cut down some of the scraps, added some stickers and stamping and finished things off with enamel dots and Nuvo Drops.


Head over to the Lasting Memories blog to check out what the rest of the design team made!

Friday, May 1, 2020

Using Up Kits- 3 Cards

I've recently used up a couple of kits/collections by making cards, so I figured I would share the results! The last layout I made with this kit was my April calendar page. When I was done with that layout, I just had a few smaller scraps left, not enough to make another layout without getting really creative. I decided to make some quick cards. For these cards, I cut the patterned paper scraps to size, fussy cut some butterflies, added some stamping and Stickles and Nuvo Drops. 


Make sure to stop back on Sunday for some exciting news and my next set of cards using up a kit!