Saturday, January 23, 2021

Junior Dog Whisperer

Hello and happy weekend! I have a new layout to share today! I was inspired by the fun sketch at challenge at Scrap Our Stash this month:


I added another photo , but stuck pretty close to the inspiration layout in design. I initially was just going to use the woodgrain paper for the base of my page, but decided to trim it down and add the green cardstock behind it. I cut a large square out of the middle of the green cardstock and that's what I used to cut "Whisperer" with my Cricut. I cut that word 3 times and stacked the letters to give it some dimension. The green was getting a little lost on the leaf and bug paper, so I inked the edges with dark brown ink. I stuck with mostly natural textures for my embellishments- wood veneer, cork, metal. 
This layout has a good mix of some really old products- the letter stickers, gromlet, button brads, and with the newer (to me anyway) "Never Grow Up" collection. It was really fun to dig into some of my older stash and use it! I am entering this layout in the "Old and New" challenge at The Studio.

Thanks for stopping by to check out my layout!


Tuesday, January 19, 2021

Fly High

Hello! I have a new layout to share today! This one was based on this sketch from Paper Issues:


As you can see, I added several more photos than the sketch suggests, but stuck pretty close to the sketch from there. This sketch worked great for the scraps I have of a couple of collections. Once I got my background pieces cut and attached and attached my photos, I went to work on the title. I decided to use DIY Thickers and some glitter. I am running out of letters in this set, so I ended up cutting down a "J" for an "L" and an ampersand for the "G". Get creative with those letters! I used a Paper Issues cut file for the little bursts around the page. For the frame around the layout, I used my sewing machine and black thread. I finished off the layout with some stickers and Nuvo Drops. 


Monday, January 18, 2021

Happy Birthday card- Stick It Down

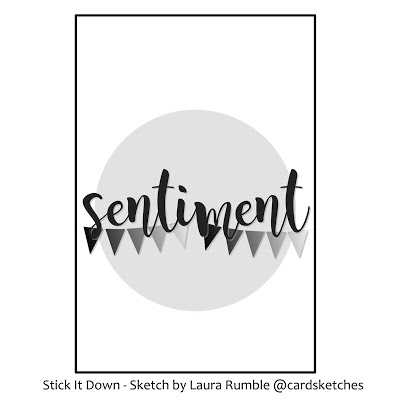
Hello all! I have a new card to share today. I started with the current card sketch from Stick It Down:


I wanted to play a little with inking, so I started by using a blending tool and yellow and orange distress inks to blend the entire background. Then I took a circle mask and a blending tool with VersaMark. I covered the circle with clear embossing powder and heated it. The embossing wasn't as solid as I was hoping so I did another layer of VersaMark and clear embossing powder. I then pressed my Black Soot Distress Oxide ink onto a plastic panel and sprayed it with water. I ran my card front through the ink until it was covered. I took an ink blending tool and did a bit of extra blending around th ecircle to make sure it stood out more. I used Archival ink for the geese and sentiment. To finish off the card, I added some gold stars.


Saturday, January 16, 2021

Yoda Birthday Card

Hi all, I have a card to share today! I made this card for my son's 8th birthday. He is a big Star Wars fan, so I went in search of a fun cut file to use on his card. I ended up finding this site which has several cut files. This one was NOT easy to assemble! The outline is truly an outline and was very fragile. I ended up using Press and Seal to help lift the outline off the cutting mat (along with a spatula) and keep it in shape. Then as I cut out the other colors, I placed them face down on the outline. You are going to want to add glue to areas of the outline that are under the other colors, I didn't and then had to go back and add it once I had it assembled- which wasn't easy! Here you can see what the front looked like while still on the Press and Seal:

Once I had all the pieces together, I ran my adhesive gun over it several times, making sure to get areas where there were multiple small pieces to help keep them in place. This is what the back looked like with the adhesive added:

 For the background of my card, I used a tiny star mask and glimmer spray. I then pressed the die cut onto the card front. With the detailed die cut, I didn't think the card needed anything else on the outside!

Thanks for checking out my card!

Friday, January 15, 2021

Let's Celebrate

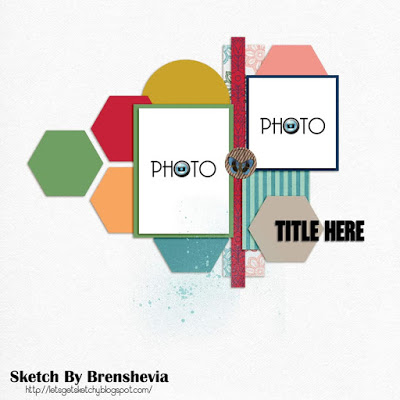
Hello again! I have another layout to share today! This time I was inspired by this sketch from Let's Get Sketchy:
Once again, I added more photos than the sketch suggested. I also used squares instead of hexagons because they were quicker and easier to make. I used a bunch of scraps for this layout since it didn't require large pieces of patterned paper. Once I had my squares cut and adhered, I used some washi tape and a thin strip of paper for the vertical strip. I decided to add some interest to the top right and bottom left corners, so I pulled out a mask and Distress Oxide ink in Crushed Olive. I then splattered some grey ink over that. I used my Cricut to cut the title. I wrote my journaling directly on the layout. To embellish my layout, I used a die cut tag and ribbon, stickers, a flair badge, and enamel dots. 

 Thanks for stopping by to check out my layout!

Thursday, January 14, 2021

Oh Brother

My blog has been a bit quiet, but I have been busy creating! I will be sharing what I have been working on over the next few days. First up are a couple of layouts for my middle son's book. 

My first layout has photos of him and his older brother when he was a baby (he just turned 8! 😱). I ran some patterned paper down the center of my cardstock and then layered my photos over the top. I double matted the adorable focal point photo to make it stand out a little more. I added washi tape between the photos down the right side to break them up a bit. For the title, I used my Cricut. I am loving how easy it is to cut thin chipboard for my letters to give them some dimension! I found a quote I liked for the journaling and then went to work embellishing. I used some brads, chipboard hearts, stickers, and rub ons to finish the page. 

Next up is a recap layout of the first 6 months of his life with his milestones and growth. I used some 3x4 and 3x3 cards on the layout to add some interest between the photos. I used a digital element and matched the color to my patterned paper and typed the journaling before printing them out. I added rub on numbers of the month it covered to the end of the journaling spots. I used my Cricut to cut out my main title and letter stickers for the subtitle. I embellished the page with buttons, silver "Dew Drops", and Nuvo Drops.


Saturday, January 2, 2021

Living History

Happy New Year! I am starting the year with a new layout! I started with the photos and pulled out this piece of patterned paper I've been saving for just the right layout and decided this was it! I stuck my photos down on this awesome background and went to work embellishing. I used both Thickers and my Cricut to cut the title. The journaling tag, "Hello Sunshine" tag and the gray word strip across the bottom were all from a cut apart sheet. I used stickers, wood veneer, chipboard, washi tape, and an enamel accent to embellish the page. There is a sheet of irridescent dot stickers in the colors of the rainbow in the Shimelle #stickerbook and I decided to match those to the colors of my background to add some shimmer to the page. 

 I was inspired by the Word Play- Lights challenge at Lasting Memories. The challenge was to use something for each letter of the alphabet on your layout. Here's mine:

L- letter stickers

I- irridescent stickers

G- green

H- hand written journaling

T- tag

S- stickers