Wednesday, November 11, 2020

Sunday School Moments- Sketches In Thyme

Hey all! I have another new layout to share! This time I was inspired by this two page skech from Sketches In Thyme:


I took quite a few liberties with this sketch, but hopefully you can see the inspiration in my layout! I wanted to include a certificate and program on my page, so I used the certificate as an element on my left hand page and made a pocket for the program on the right. I didn't have a bunch of square photos, but 3x4 rectangles. I used those on the right hand page to make the blocked pattern. I found space on the certificate for the class photo and I matted that on gold polka dotted transparency to frame it, but make the certificate still readable. For embellishment, I used some stickers, rub ons, and Nuvo dots/ Liquid Pearls. The word "moments" in my title was from a sheet of patterned paper that I trimmed down. The rest of the title was stamped with coordinating ink (it is easier to see in real life). I'm happy with how this layout turned out. I struggle sometimes to include ephemera and this sketch worked well for what I needed!


Sunday, November 8, 2020

Hello Easter

Hello, I have a layout to share today! For this layout, I used the two page PageMaps sketch from February:


I had different photo sizes, so my layout looks a little different, but the sketch really worked well for these photos. The papers I used were Shimelle's Never Grow Up. The egg cut on the left page was leftover from the full background that I had cut and used pieces on the last layout in this post and this layout. I used Distress Inks that went with the dots on the background paper to ink the cut piece. I cut a journaling card apart and used the bulk of it under my photos for my journaling and I added the top strip above my photos on the right. I embellished my page with some tags, die cuts, wood veneer pieces, brads, and enamel dots. I found the wood "hello" in my stash and decided to use it with chipboard letters for my title. 

 One of my daughters saw me making this layout and was jealous that it was going in her brother's album. Guess that means it's a good one, ha!

Saturday, November 7, 2020

Catching Up- Several Cards

I have some more cards to share today! A couple used sketches that were current when I made them, but I never got around to posting them.

First up is this birthday card for my daughter using this sketch from Sketch Saturday:


I used a bunch of scraps from other projects for this card. They were all using alcohol inks and alcohol lift ink. The cupcake was fussy cut from the square behind the white piece- using every last piece! I stamped the sentiment on a scrap of white cardstock  and cut a piece of ribbon to finish off the card.

Next is another birthday card, this time using last week's CAS(E) this Sketch:


I had a different idea for what I wanted this background to look like, but my crafting products had other ideas. I inked the entire background with Distress Ink. Then I was going to use a mask and the Distress Resist Spray. Unfortunately, the sprayer on my Resist Spray is not working well, so the spray came out in large drops instead of a fine mist. The effect was still pretty cool, so I went ahead and used it. I used Brushed Corduroy Distress Oxide Ink and went over the background. The spray resisted the new ink allowing you to see the original inking. I used my Cricut to cut the sentiment. The word "Happy" was cut three times and then stacked to give some dimension. I stamped the small sentiment on a scrap of the paper used for "birthday" and cut it into a banner to finish off the card. 

Next I have a pair of anniversary cards. I got a couple of new ink colors this week, so I wanted to try them out, so I used them and a few other colors with a turnabout stamp to make these cards. I made one 6x6 panel and then cut it in half to make two cards. I used some coordinating glitter paper to cover the rest of the card front. I found some ribbon scraps in matching colors to cover the seam; one was long enough to tie a bow, the other was not. To take the place of the bow, I stamped another flower and leaf. I stamped the sentiment and cut a banner and finished the cards off with some Nuvo drop and Liquid Pearl details.

Finally, I have a sympathy card. I had this alcohol ink background sitting waiting to be used for about a year. I then went with a design I have used many times for sympathy cards. I stamped the branch directly onto the card front and then stamped the flowers and butterfly on white cardstock. I fussy cut the flowers and butterfly and attached them to the card, the flowers with regular adhesive and the butterfly with foam adhesive. I finished of the card with a heat embossed sentiment.


Friday, November 6, 2020

Birthday Cards- Stick It Down

 Hello! I have some catching up to do with my blog, so I will be sharing a few things over the next few days. First up is a pair of cards that I made using the current card sketch from Stick It Down:


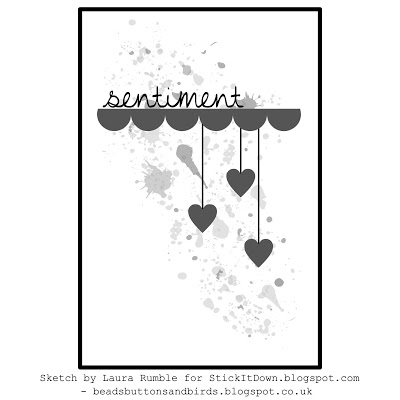
For the backgrounds of my cards, I gathered some coordinating scraps and cut them into strips. I then attached those strips to a cardstock base and trimmed the excess. I punched the strip detail and attached that with foam tape. For the sentiment, I stamped and heat embossed it onto white cardstock and then fussy cut it, attaching that with foam adhesive as well. I punched the stars and then heat embossed them repeatedly with clear embossing powder. The strings are silver Nuvo dots. I considered using string, but decided that was too tedious. The card on the left is for my nephew who is turning 4 and the one on the right is for my niece turning 5, hence the number of stars.


Thanks for stopping by to check out my projects!

Saturday, October 31, 2020

November Calendar Page- Stick It Down

Hi all and Happy Halloween! I got my November calendar page done just in time for November! I once again used the double page sketch from Stick It Down:


I loved that I could get so many photos on this layout. All squares was a little tricky for me, so I switched it up a little and combined a couple of the spots to use rectangles. I used a bunch of scraps to make the squares. I initially wasn't going to ink the edges, but felt like they needed something to set them apart from the background paper, so I inked them with brown ink. I cut my title with my Cricut. For the journaling, I handwrote it across the bottom. I embellished the page with stickers and chipboard pieces. I finished it off with some dirty bronze Nuvo drops, they are so pretty!


 My youngest was diagnosed with leukemia last November, so my monthly pages will have hospital photos on them for the next several months. It was interesting going back and reading my journaling from that time and reflecting on how much our life changed in a short amount of time. (He is now in remission and doing very well!)

Thanks for stopping by to check out my page.

Saturday, October 3, 2020

Playtime- Sketches in Thyme

Hi all! I have a new layout to share today! For this one I started with the current sketch at Sketches In Thyme:


 I liked the three clusters on the page and decided to use 6 photos. I used a mask and spray mist to create the polka dot background. I then smooshed some distress inks in each of the photo areas (which ended up being mostly covered up by the photos). Once that was dry, I adhered my paper strips and photos. I used my Cricut to cut the file and did a bit of journaling above the title. To embellish the page, I used stickers, a vellum piece, chipboard arrow, enamel dots, stickers, and sequins. 


Friday, October 2, 2020

Happy Birthday- The Card Concept

Hi all! I have another birthday card to share! For this one I was inspired by the current challenge at The Card Concept:

I used it to make a Clean and Classy card. The inspiration photo is colorful leaves, but the way they were laid out made me think of flowers, so I found this cut file and cut it from green cardstock. Then I took patterned paper and backed all of the openings. This step was a little tedious, but I love the result! I then went around some of the leaves with Nuvo Drops. Once they were dry, I stamped the sentiment on white cardstock and attached it to the card. I finished it off with some sequins.