Saturday, July 31, 2021

August Calendar Page- Stick It Down

Hello! I have my August calendar page ready just in the nick of time! I started with this sketch from Stick It Down:


I pulled out Shimelle's "Never Grow Up" collection and found some fun papers to work with. Since a lot of my photos were outside, it worked to use the more outdoorsy papers. I matted the large photo on the left hand page with white cardstock to make it stand out from the busier background papers. I used my Cricut to cut the title from silver foil cardstock and chipboard. I layered them together for dimension. I dug into my stash for embellishments, using some pretty old stuff! For the border under the large photo, I went back to my Cricut and found the ladybug border. I cut the colored pieces to match the colors of the t-shirts in the photo. Side note on the photo- we celebrated my father-in-law's retirement last summer and we had t-shirts that were color coded by framily. We had the grandchildren line up from oldest to youngest. There are two more babies that have been born since this photo (one is represented by the onsie on the ground on the far right) and two more on the way!

 Thanks for stopping by to check out my layout!

Saturday, July 17, 2021

Get Out!- Let's Get Sketchy

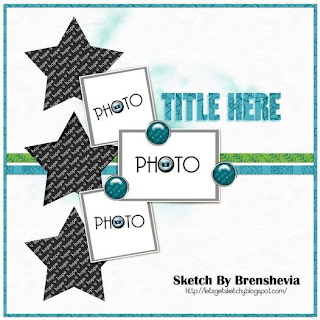
Hello all! I have a new double page layout to share! I started with this sketch from Let's Get Sketchy for the left hand page:

I started my layout by smooshing some blue inks on my left hand page for the background. I decided the right hand page needed some splatters too, so I took a paintbrush and added splatters in the same colors. Then I layered on my strips of patterned paper. I used my Cricut to cut the stars, first the star border and then the individual stars. To make them stand out a bit, I took a Sharpie and outlined them. Once I had the stars and photos attached, I went to work on the title. I ended up using some DIY Thickers that I've had for a long time (I don't think they still make them, which is sad becausse thay are awesome and so customizable!). I peeled the backing paper off the fronts and then took a sheet of white flocking and pressed that onto the adhesive. To make the letters yellow, I pulled out my chalks and rubbed the yellow on with a q-tip. I then found some blue rub ons for the rest of my title. I used a journaling stamp to create the lines for my journaling. I then dug through my stash and found various stickers, rubons, and epoxy/enamel pieces. I fussy cut a few leaves from some patterned paper to scatter around the page. 


 I am also entering this in The Studio's Multiple Photos challenge.

Monday, June 28, 2021

July Calendar Page

Welcome back! Today I have my July calendar page to share! I started with this sketch from Stick It Down:


I have a new Americana collection from Echo Park that I got to dig into for this layout. I used several of the 3x4 cards and created a few more from the patterned paper. I also used a couple of pieces of some other red, white and blue papers I have. Once those were all attached, I used my sewing machine to zig zag stitch all of the lines to add a little separation between the sections. I matted my big photo on a piece of pattened paper. I had one 3x4 card that had space for journaling, so I used that and stamped spots for journaling for each of the photos. For the title, I cut the word "July" using my Cricut from navy cardstock and chipboard and layered them together. Once they were attached to the layout, I used Glossy Accents and covered the word to give it some extra shine. I also used my Cricut to cut the stars from red and navy cardstock that I placed in a few places around the page. I finished off the layout with some sequins and Stickles for some sparkle.


Sunday, June 27, 2021

More Cards

Hi all! I'm back today catching up with sharing the cards I've been making. First up is a pair of cards I made using the current card sketch at Stick It Down:


I started by making the backgrounds using the Triangles Turnabout Stamp. I decided to make these cards monochromatic, so I found a few shades of blue and black to work with. I also wanted to see how it looked on different colors, so I stamped one background on white and the other on a blue gray color. I took the same ink colors and stamped the cupcakes on white cardstock squares. I stamped and heat embossed the sentiment and then cut it out. I added a strip of silver foil paper behind my cupcakes. To attach the sentiment, I used foam tape to add some dimension. I finished the card off with silver Nuvo drop "sprinkles" on the cupcakes.


Next up is a pair of Father's Day cards I made using this sketch from Sketch Saturday:


I used a wood grain embossing folder to make the background panels. I then used a layering stamp to make the circle sentiment. I heat embossed the sentiment. I made the stripes with a couple of stripes of washi tape. I finished off the card front with some brads.


These last two cards were my own designs. For this baptism card, I dry embossed pale purple cardstock and then lightly inked the raised areas with an inking tool to make them stand out a bit more. I stamped the flowers on vellum and colored it in on the back. This is a great way to make sure the stamping stays bright and doesn't get smudged or covered by your coloring. I stamped and heat embossed the sentiment and then attached it to my card front. I decided it needed a bit more of a frame so I mounted it on a piece of purple cardstock and then onto my card front.


Finally, I made this card for my husband for our anniversary. I started with a piece that had the "love" resist and gold heart on it. I did the smooshing technique with blue inks to create the background. Once that was dry, I used my Cricut and cut the "I" and "you" and attached them to my card front. I finished off the card with some dots of iridescent Stickles. 


Saturday, June 12, 2021

Cards, cards, cards!

Hello all! It has been a bit! I had a few photo sessions in close succession and I didn't get a chance to post some cards I made. 

I'll start with the cards I made most recently. I started with this sketch from Sketch Saturday:


I started by stamping and heat embossing the background stamp on watercolor paper. I then took some yellow, green and blue Distress inks and pressed them, one at a time, onto a plastic surface. I then misted the ink with water and pressed my paper into the ink. I let each color dry before doing the next color to prevent them from mixing too much. Once it was all dry, I trimmed the pieces down and attached them to a black cardstock panel. I stamped the sentiment and present on coordinating cardstock scraps that were already on my desk. I rounded the corners of one end of my tag and attached the twine with a staple before attaching the tag to my card.


Next up is a pair of cards that I stamped onto vellum to create. I used some layering stamps for these. Once I had all of the layers stamped, I realized that both sides of the vellum looked really cool, but ended up using the side I stamped on. To add some interest to my background, I used my Stamping Gear to stamp a subtle pattern. I then adhered the vellum over the stamping. I cut the sentiment using my Cricut. To finish off the card, I used some Stickles for the centers of some of the flowers.


These last three cards use the same technique as I used on the first two. I had a lot of fun with this technique and I love the colorful backgrounds it created! For this card, I used the entire piece for my background. I used my Cricut to cut the sentiment and underlined it with a piece of washi tape. I finished of the card with some Liquid Pearl accents.


I cut the inked piece in half for these two cards. I added a strip of glitter cardstock and dry embossed a piece of yellow cardstock for the bottom of the card. I heat embossed the sentiment onto vellum and wrapped the piece around the top part of the card and attached it in the back. I finished the cards off with gold Liquid Pearl accents. 


Friday, May 28, 2021

Celebrate card

Hello all! I'm here today with a couple of cards to share! I had some fun playing with Distress and Distress Oxide inks on both of these. For my first card, I used a combination of both kinds of inks. I would press the pad onto an acrylic plate, mist with water and then press a piece of watercolor paper into the ink. I let the ink dry between each color. Once I was happy with that, I took a striped mask and used a blending tool to add the stripes in the background. I then stamped and heat embossed the butterfly on purple cardstock. To give it some variation in color, I used a blending tool and a couple of purple Distress and Distress Oxide inks and blended over it. The heat embossing resisted the ink, allowing the original cardstock color to show through. I attached the butterfly with foam adhesive, stamped the sentiment and added some sequins.


 I was inspired by the current tic tac toe challenge at Use Your Stuff:


I used the middle row of embossing, butterfly and and stripes.

I also made an anniversary card. For this card, I stamped and heat embossed the heart leaf background. I then took a rainbow of Oxide inks and blended them over the stamping. Once again, the embossing resisted the ink, allowing the white paper to show through. I used my Cricut to cut the sentiment. I finished off the card with silver Nuvo drops.

Wednesday, May 26, 2021

June Calendar Page

Hello! I have my calendar page ready a few days early! As I was picking labels, I realized this layout has a bit of everything! I started once again with the double page sketch at Stick It Down:

I split the vertical photos to get more in and added an extra in the journaling space. Paper Issues had an amazing layout to scraplift here which inspired by drippy rainbow border. I also put my Cricut to work on here and cut a vine and some flowers (the background die cut was cut for a previous project that I ended up going another way on). The flowers had several pieces so I ended up putting them on vellum to hold the pieces together and cutting them out by hand. I found stickers that matched the colors of my drips and combined them with the flower for the border on the right hand page. For my title, I stamped and heat embossed the letters and then fussy cut them. I attached them with foam tape to my layout. To finish of the layout, I scattered some white sequins.


 I am also entering this in the Bitten By the Bug 2 Flowers challenge