Tuesday, February 25, 2025

Wild One

Hello, I'm sharing another layout from the Creative Memories virtual crop today! I started with this sketch:

I used some photos from my son at the zoo. I started by selecting my papers and then cut the zebra border with my Cricut. I had cut another border for the bottom, but it didn't cut well, so I used the leopard print ricrac instead. I cut and adhered the title. Then I went to work embellishing. I pulled out a couple of printed chipboard pieces that worked. I then searched Design Space for some animals to cut and add to my layout. I finished things off with some homemade green enamel dots. 


 I am also entering this in the Lasting Memories band design challenge.

Monday, February 24, 2025

March Calendar Page

Hello! I'm here today with my March calendar page. I used this sketch from the Creative Memories virtual crop:

I started by cutting the large patterned paper down to size for the background. I matted the photos on the outside with a coordinating color of cardstock. For the borders, I punched a bunch of flowers with two punches. I ran a line of adhesive down the edge of the patterned paper and stuck the flowers on it, alternating the colors. I used journaling strips and stamped lines to add the captions and journaling. I embellished the page with some washi tape, epoxy and canvas flair, and ink splatters. To finish things off, I added blue liquid pearls to the centers of the flowers in my borders.


Sunday, February 23, 2025

Two More Dance Layouts

Hello! I've been creating again but not posting, so I need to catch up! Today I'm sharing a couple of dance layouts.

For the first, I was inspired by this sketch from Paper Issues' January daily sketches:

I started by using a 6x6 background stamp and stamping it 4 times on my background. I did my best to line it up to make the seams unnoticeable. It helps that my photos are big and cover most of it up. I splattered some silver and red ink in the corners. I then matted the group photo on glitter cardstock and adhered all my photos to the page. I cut the title and bow tie using my Cricut. I didn't do much for embellishments since the background is pretty busy. I added a journaling sticker and cut the "2" off of a 2007 sticker to add the little "007" detail under the bow tie.


 Two weeks ago I discovered there is a Creative Memories group on Facebook that hosts a virtual crop each month. They post 4 sketches and you get to create with them! I started with this sketch: 


I moved things around a bit on this one. I flipped the circle placement so the largest piece would be visible. My photos are larger. Instead of a full border across the top, I used my sewing machine to create flying trails for my bees. For the embellishment clusters, I stamped flowers with coordinating ink and then layered flowers that I cut with my Cricut over them. I used gems and buttons for my flower centers. The title was cut with the Cricut and I finished everything off with some puffy bee stickers.

Sunday, February 16, 2025

Valentines With Non Traditional colors

Hello! I'm sharing my last two Valentines today. While these cards include some pinks and reds, they also have some less traditional colors. 

First up is this card. I had picked up a set of green Distress Oxide sprays a few weeks ago and wanted to use them. I started by taking two of the colors ( Peeled Paint and Mowed Lawn and sprayed them over a panel of watercolor paper. Once that was dry, I stamped the leave heart over the background with just water. I did this by misting the stamp with a spray bottle and then pressing the stamp onto the background. I ended up doing this a few times because it didn't show up as much as I had hoped. I then stamped with Versamark (those are the darker ones). Finally, I stamped with a script background stamp with white ink and some water. I also stamped the heart on watercolor paper with Versamark and heat embossed it with white embossing powder. I used some inks and a water brush to color them in. I fussy cut the flower and attached it with foam adhesive. To finish off the card, I cut and adhered the "i" and the "u".


 For my last card, I found this cute Cricut cut and decided to use it. For the background, I used a piece of blue cardstock. I tore an edge off a scrap piece of paper and then blended ink over the edge to create the ground. I then assembled the truck.

Saturday, February 15, 2025

Valentines With Black Backgrounds

Hello! I'm back with a couple more Valentines to share (I make them for my husband and each of my kids, so I make a bunch). Today's cards started with black cardstock for the background. First up, I stamped this circle stamp with white pigment ink and then heat embossed with white embossing powder. I forgot to run an anti static tool over the cardstock before I stamped, so I ended up with quite a bit of stray embossing powder. I was able to brush some off, in the open areas, but was left with some. I then cut some hearts from a couple of different papers using my Cricut. I placed the hearts in circles, using foam adhesive for the glitter ones. I used my Cricut and a pen to create the sentiment strip.
For my second card, I used a mask and blended white pigment ink and Lumberjack Plaid Distress Oxide ink over the mask. I cut the heart and sentiment with my Cricut. I ran the heart through an embossing folder for some added dimension and interest. I finished off this card with some red Nuvo drops.


Friday, February 14, 2025

Two Cards With Similar Design

Hello again! I have more cards to share today. I used similar colors to the ones I shared yesterday. This time I used the triangle Turnabout stamp (it appears this one is no longer available). I stamped both of these at the same time, just alternating between the two pieces of paper with each ink color. I then cut stamped the little animals with balloons. I colored each one with watercolor pencils and blended the color with a water brush. I used cardstock for the first card and watercolor paper for the second. You can see the color blended better on the watercolor paper.

For the first card, I then cut some hearts using the Circut to go behind the balloon. I stamped the sentiment on the balloon and then adhered it over the top of the other hearts. 


I finished off both cards with a sprinkling of sequins.


Thursday, February 13, 2025

Valentines- Sketch Saturday

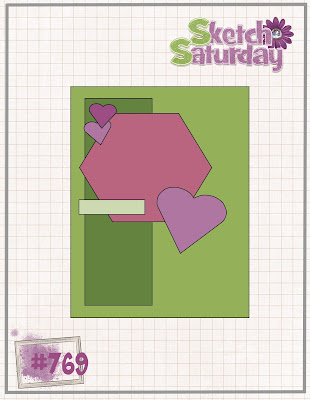
Hi all! I've been busy making cards the last few days! First up is a pair of Valentines for my daughters, inspired by the current sketch at Sketch Saturday:

I started by inking the background with a new set of masks. This is such a fun set! I cut the strips of vellum and added them to my card. I then cut the "Love" sentiement from glitter cardstock using my Cricut. I also cut the little hearts with the Cricut. To transfer the "Love" sentiment from the mat to the card and keep the spacing, I used press and seal to lift it off the mat, put glut on the back of the pieces and then glued it onto the card front. To complete the sentiment, I stamped the word "you" on a strip of white cardstock and layered that over the heart.