Friday, July 31, 2020

Happy Birthday- Fusion


Hello, I have one more card to share today! This time, I was inspired by the challenge at Fusion:

How fun is that inspiration photo? I found a popcicle stamp in my stash and decided to work with that. I stamped and heat embossed the popcicles and then painted them with Gelatos. They have a fun shimmer that is hard to see in the photo. I attached them over a patterned paper strip to my card front. I cut the sentiment from patterned paper and attached that. I felt like the card front needed a bit more, so I used my sewing machine and stitched a border around it.

Thursday, July 30, 2020

HBD- Bitten by the Bug 2


Hello again! I have another card to share today! For this one, I was inspired by a couple of challenges. First up, I was inspired by the current sketch at Sketch Saturday:


I was also inspired by the Cute Critters challenge at Bitten by the Bug 2.  I made this card for my nephew who just spent the last several months taking the family dog (a golden retriever) to obedience training, so I colored the dog to look like their dog. The dog cut is from the "A Quilted Christmas" cartridge. The cut included a Christmas ornament on the dog's nose that I cut off. I cut banners to go across the background to add some festive interest. For the sentiment, I cut "HBD" to fit in the the bottom row of banners. I finished off the card front with some eyelets. 

Wednesday, July 29, 2020

Happy Birthday cards- CAS(E) This Sketch

Hello! We have a big family birthday party coming up in about a week, so I made several cards for that using the current sketch from CAS(E) This Sketch:

I started all of these cards by stamping and coloring the cute little animals. I then fussy cut them out. Then I got creative with the backgrounds. For my first card, I used patterned paper matted on cardstock for my background. It is hard to see in the photo, but I did a little smoosh of light blue ink on the background behind where I put the dog to ground him a bit. The sentiment is cut from patterned paper and mounted on cardstock. I felt like I need a little something across the bottom, so I used a border stamp and added the swirly border. To add a little fun to the dog, I used a Versamark pen and heat embossed the nose with black embossing powder.

For my next card, I used the ink smooshing technique and different shade of blue on my background cardstock. Once that was dry, I dry embossed the background with dots because they reminded me of bubbles. For the whale (again, hard to see in the photo), I pressed it into Versamark ink and heat embossed it with clear embossing powder three times to give it a smooth, shiny appearance. I stamped the sentiment with Distress Oxide ink to make it stand out on the dark cardstock strip.

For my final card, I stamped the background with a Turnabout stamp. I then inked the edges to give it a more finished look. For the cat, I covered the lens area of the glasses with Versamark pan and heat embossed it with clear powder. I absolutely LOVE the way the glasses turned out on this guy! I stamped the sentiment on a coordinating piece of cardstock and inked the end of it before attaching it to my card.
Thanks for stopping by and checking out my cards!

Sunday, July 26, 2020

Sweet Dreams

Hello and happy weekend! I have a new layout to share today! For this layout, I was inspired by this sketch from Sketches In Thyme:

I was also inspired by the "This or That" challenge at Paper Issues:

Image may contain: text that says 'This or That www.paperissues.com Stars or Polka dots Red or Blue Button or Flair Doily or Circle Paperclip or Clothespi Pom Pom or Sequins Stripes or Floral Pattern'

I started my layout by smooshing watered down gesso on my cardstock. I then splattered some gold spray ink over my page. I smooshed some of those spots as well for more texture. I had one more photo than the sketch, but I still managed to arrange them in a similar way. Once I had all of my patterned papers and photos arranged and attached, I went to work on the title. I used my Cricut to cut both words. After "sweet" was cut, I heat embossed it with gold powder to match the golds on my page. The word "dreams" was attached with foam adhesive for some dimension. I didn't have anything to say specifically about the photos, so I found a bible verse that talks about sleep and printed that on some vellum. A scattering of buttons and star sequins finished off the layout. From the Paper Issues list, I used stars, blue, button, circle, paperclip (it's the gold heart in the bottom right), sequins, and stripes.
Thanks for stopping by to check out my layout!

Wednesday, July 22, 2020

Flip Out

Hello! I'm on a roll and completed another layout! This time I was inspired by this sketch from Sketches In Thyme:


I was also inspired by the Stars and Streaks challenge from Paper Issues. I decided to use Distress Stains that coordinated with the colors on the "Wild Child" card. I took them directly to the paper and drew the rays. I had a few more photos than what was shown in the sketch, but I just made a cluster of them along the bottom. I moved the title higher since I had so many photos. Once I had my photos, papers, title and journaling down, I decided the top needed more. I've seen some fun layouts using embellishments of the same color and decided to try that here in my rays. I pulled out my Shimelle #stickerbook and used cordinating stickers.
Thanks for stopping by to see my layout!

Tuesday, July 21, 2020

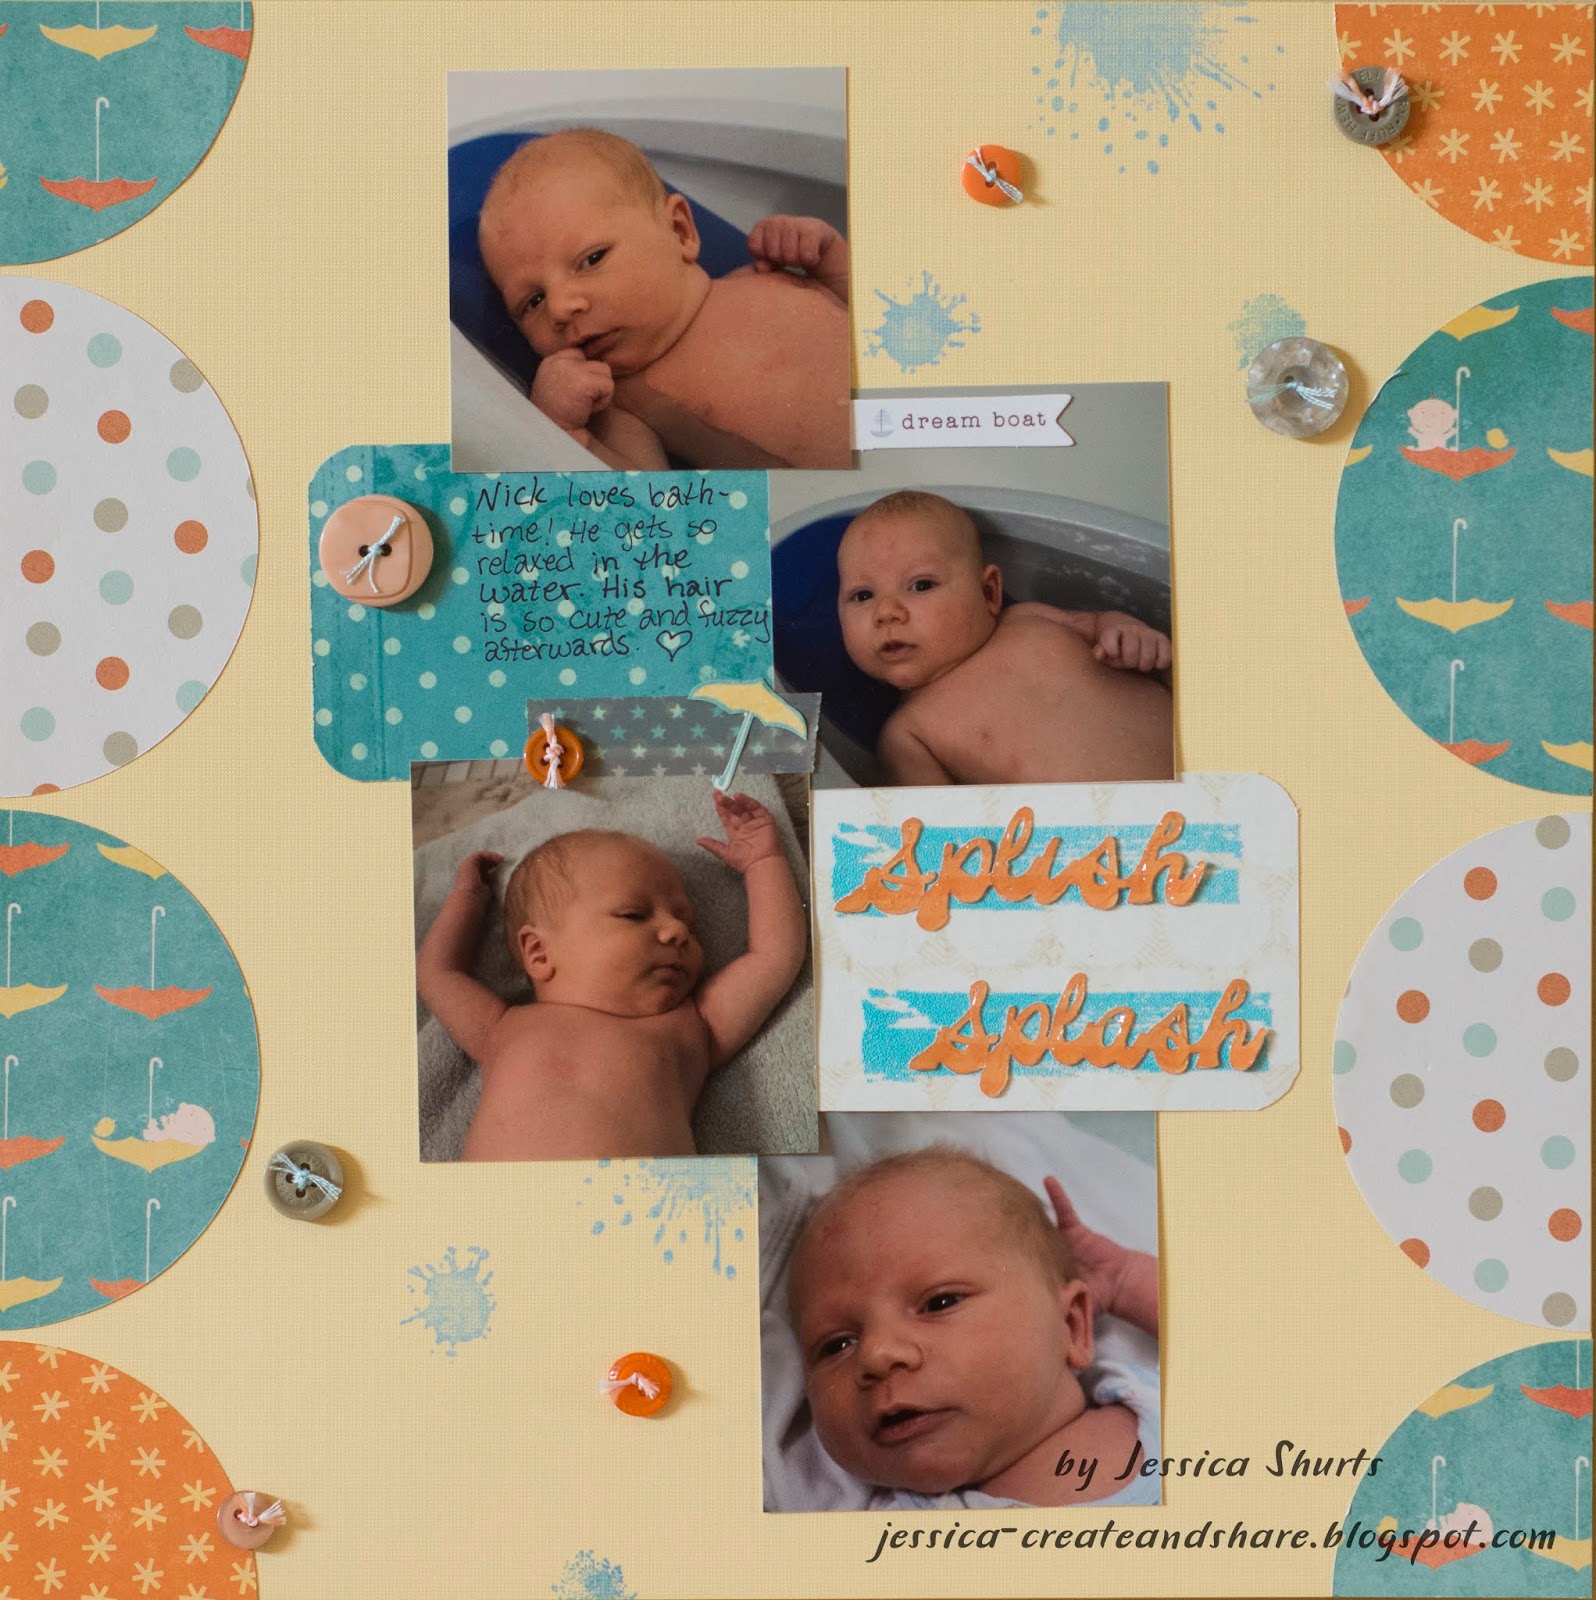
Splish Splash

Hello, I have a new layout to share! I was inspired by this sketch from Paper Issues:

No photo description available.

I adjusted the sketch to fit these four photos of my son in the tub as a baby. For my title, I cut the words using my Cricut. To bring some blue into my title area, I stamped and heat embossed some "paint streaks." It is hard to see in the photo, but I also used Glossy Accents on the words to give them dimension and shine. Once everything was adhered, I decided that I wanted some splatters on my page, so I ended up peeling up a couple of the photos and added the splatter stamps. I finished off the embellishing with some buttons. 
Thanks for stopping by to check out my layout!

Friday, July 17, 2020

Snow Much Fun

I know, I know, snow in July?! I still had these photos to scrap, and they worked for a couple of challenges, so I went with it! The first challenge is this color palette challenge from The Studio:

I knew I was going to make a two page layout, but thought I would use a sketch for one of the pages. I used this one from Paper Issues:

No photo description available.

The colors of the palette went so well with the colors of my kids' coats, I just had to find papers to go with it! I started with black cardstock and created masks with an old paper bag. I used temporary adhesive to attach them to my cardstock and then stamped and heat embossed the snowflakes. Then I took Perfect Pearls mist and sprayed that to give the paper a shimmer. I then spritzed and splatter some white spray ink. I finished off the masking with a dot stamp that I stamped in a very light pink color. I like how it made the appearance of a snow hill or the top of a heart. I then went to work with my photos and scraps in the colors of the palette. I used up so many scraps on this layout! Does anyone else get excited to use up scraps? After everything was adhered, I cut the word "snow" using my Cricut and used rub ons for the rest of my title. I finished off my layout with some stickers, chipboard pieces, a piece of washi tape, and a flair button.


Thanks for stopping by to check out my layout!