Saturday, February 2, 2019

Enjoy Every Moment

Hi all! I have a new layout to share that isn't a calendar layout! This is a layout for my oldest son's book. Since this page is about water, I decided to make some waves from some patterned paper. The second layer I lifted with some craft foam. I embellished the page with various stickers. I also used some clear Dew Drops around the page to look like water droplets. 


I felt like it still needed a little something so I splattered some blue ink while covering the photos. I'm entering this in the Lasting Memories Challenge to use multiple photos.

Thanks for stopping by to check out my layout!

Friday, January 25, 2019

February Calendar Page

Hello all! I have my calendar page ready for February, and it's a week early! I was inspired by this month's two page sketch at Stick it Down:


I stuck with the general shapes, but moved my title and journaling. I used Project Life cards across the bottom since I didn't have tags and I had cards that coordinated with the papers I was using. For my title, I used rub ons on a piece of patterned papers. I matted that and attached it with foam tape. I was also inspired by the current Lasting Memories challenge: bling, buttons, brads, sequins or enamel dots and finished off the page with some stickers, die cuts, and both buttons and sequins. 

Saturday, January 19, 2019

Happy Woof-day!- CAS(E) This Sketch

Hello! I have a new card to share today! I was inspired by this sketch at CAS(E) This Sketch from a few weeks ago:


I stuck pretty close to the sketch and used scraps of patterned paper for much of it. For the image, I used a Simon Says Stamp set and colored it with colored pencils. I stamped and heat embossed the sentiment. 


Thanks for stopping by to check out my card!

Friday, January 18, 2019

Distress Monoprint Birthday Cards

Hello! I have a few new cards to share using a technique that Jennifer McGuire demonstrated on her blog a while back.

I have a few background stamps, so it is always good to find new techniques to use them! First up is these more masculine birthday cards. I started by blending Mowed Lawn, Salty Ocean, and Chipped Sapphire Distress Inks on white cardstock. I let those dry, went over my cardstock with a powder tool and then stamped the background stamp with Versamark. I heat embossed it with clear embossing powder. I then sprayed the panel with water and laid it face to face with a plain piece of cardstock. I ran it through my dry embossing machine (outside of an embossing folder) to make sure it transferred as much ink as possible. To finish of the cards, I cut the sentiment and its shadow. I stamped and heat embossed the tiny sentiment on a strip of coordinating cardstock. 


My second set of cards was inspired by the current challenge at The Card Concept:


For this background, I used Black Soot Distress Oxide Ink and put the pad directly to my paper. I again made sure it was dry before stamping and heat embossing the background stamp. I used a layered clematis stamp set by Altenew to stamp the flowers with dye inks on vellum. I stamped and heat embossed the sentiment.The flowers took a while to dry, so I let them set overnight. I attached the vellum with brads to finish off the cards.

Thursday, January 3, 2019

Distress Oxide cards

I bought some new colors of Distress Ink and Distress Oxide ink when it was on sale for Black Friday. I finally had the chance this past weekend to play with it a bit. 

For my first card, I used my Stamping Gear and a rainbow of inks to make the bubbles. Then I used a water brush and used the Distress Oxide inks as watercolor to color in my bear. I then blended them onto my sentiment strip. I added the sentiment to my card with some foam tape. I finished things off with some Glossy Accents in some of the bubbles.


For my next card, I stamped and heat embossed the background stamp on white cardstock. I then blended inks from the center outward over the heat embossing. I misted and splattered a bit of Perfect Pearls mixed with water over the panel to give it some interest and to react with the Oxide inks. I die cut the sentiment using the "Sentimentals" cartridge and my Cricut and added it to my card with foam adhesive. I finished the card off with a few sequins.

Wednesday, January 2, 2019

Dancer Alcohol Ink cards

Hello again! I have two more cards to share today! The first one I made about a month ago for my daughter's 12th birthday. The background panel was leftover from another project. I tried to use Alcohol Lift Ink on it. I got a good resulting image, as you can see on the second card, but it didn't lift off enough ink to be effective on the initial panel, so I had to stamp and heat emboss the dancer and sentiment. I'm wondering if it lifts the ink better if it is freshly dry... I finished off this first card with a bit of washi tape and some sequins.


When I made the first card, I had stamped the dancer and sentiment on the pink panel and just let it set until I had a project in mind. This past week, I decided to ink the edges and add some sparkle to the card with a combination of sequins, glitter glue and Liquid Pearls.

Tuesday, January 1, 2019

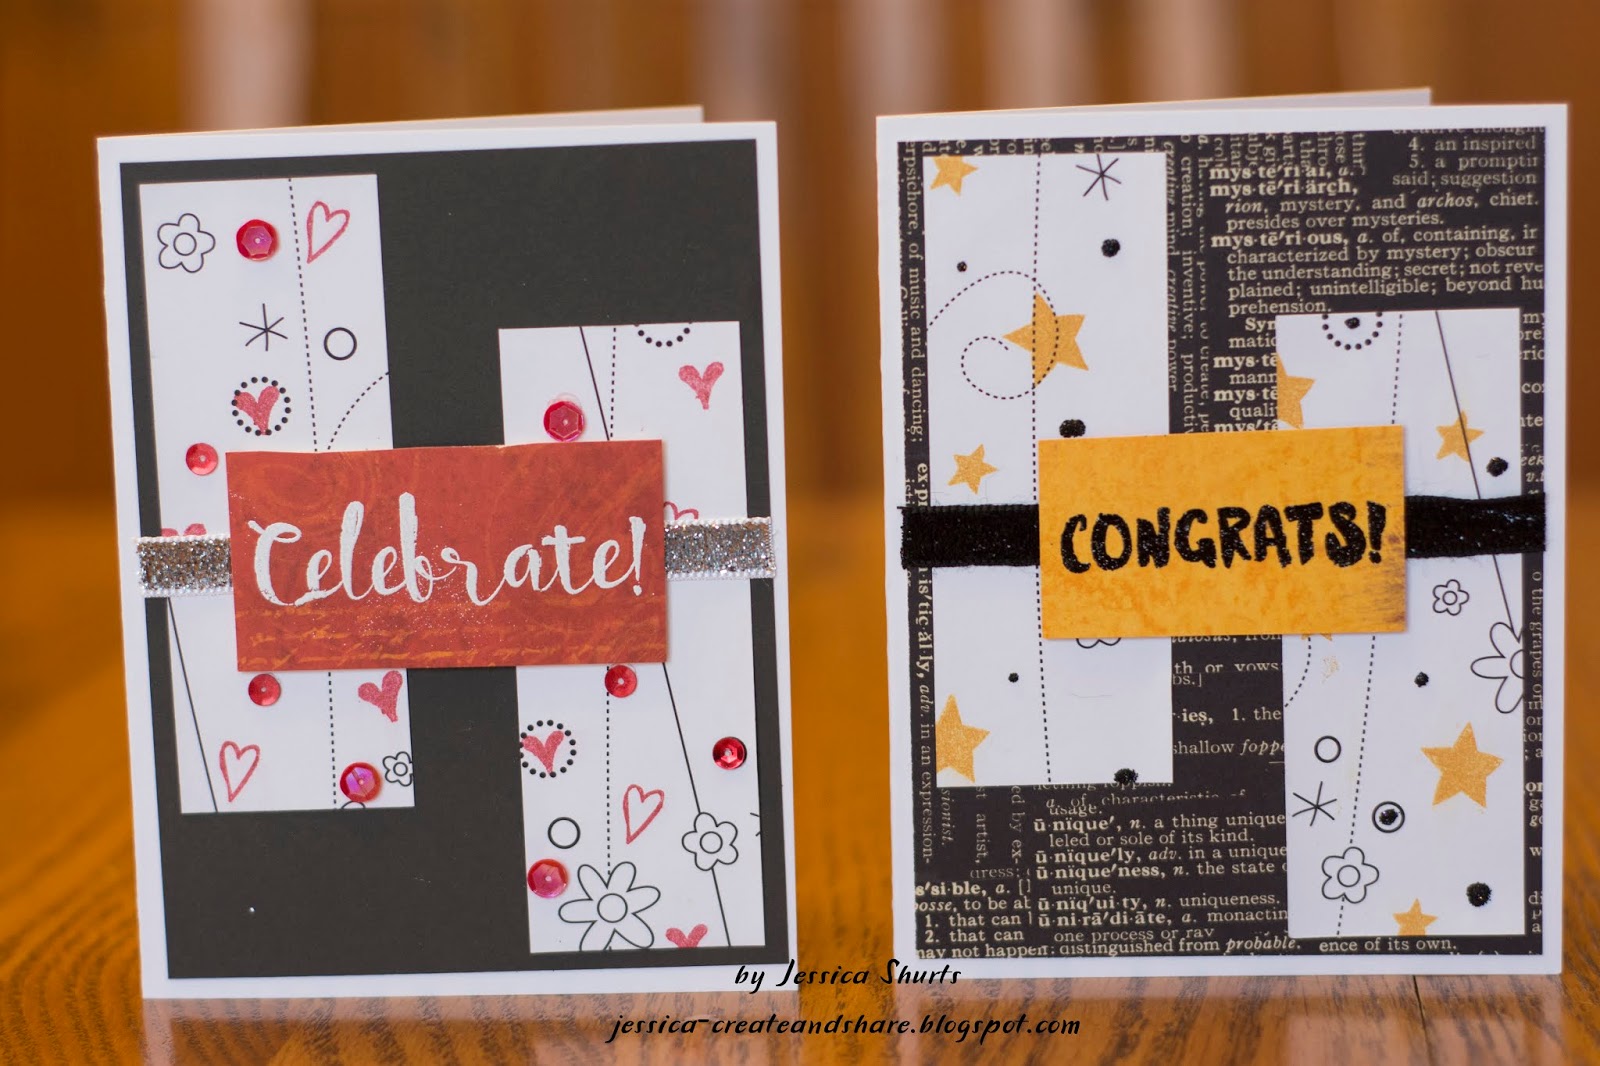
CAS(E) This Sketch cards

Hello and Happy 2019!  I have a couple of cards to share today. These came together pretty quick using this sketch from CAS(E) This Sketch:


I used scraps for these. The tall rectangles were cut from black and white patterned paper I've had for several years. I added some stamping and sequins/glitter glue to coordinate it with my sentiment patterned paper. The sentiments were both stamped and heat embossed. They were attached with foam tape over sparkly ribbon.