Wednesday, June 17, 2015

Happy Birthday- The Card Concept #37

Good morning! I have a new card to share today! (Just a heads up, there will be lots of card posts coming in the next few weeks. Today's card was inspired by the current challenge at The Card Concept:

Isn't this inspiration piece SO beautiful!? As soon as I saw it, I knew I needed to use it! I decided to go with a mixed media style, so I pulled out my Distress Inks and Stains and went to work on a piece of watercolor paper, smearing the inkpads and stains across the page in a rainbow. Then I gave everything a good spray with water and used a foam brush to blend the colors.

The butterflies were cut using my Cricut and the "Sentimentals" cartridge. I used glue on just the inner half of the wings so that the ends could lift a bit for some dimension.  I used some flower brads to connect the wings and put a bit of Stickles on them for a little sparkle. The sentiment was stamped and heat embossed.

Tuesday, June 16, 2015

Fair Fun

Hello! Tonight I have a layout to share with you that I have been working on. It is the last one for the "5 Ways To Use Gesso" class I have been working through at Big Picture Classes.  This lesson was about dry embossing and using gesso. For my layout, I cut a sheet of cardstock into 9 4x4 inch squares and then dry embossed them using 3 different folders. I then attached them to another sheet of cardstock and brushed gesso over the whole thing.  After that was dry, I sprayed and dripped some spray ink on my layout.  I added some water and moved the colors around until I was happy with the result. I then pulled out my sewing machine and stitched between the sections. 

There was a challenge on the October Afternoon blog last week to use the cut apart tags. I felt like they would work well with my page design, so I went with it, using the new Summertime collection that I picked up at the warehouse sale. I mixed in some older October Afternoon embellishments for finish off the page.

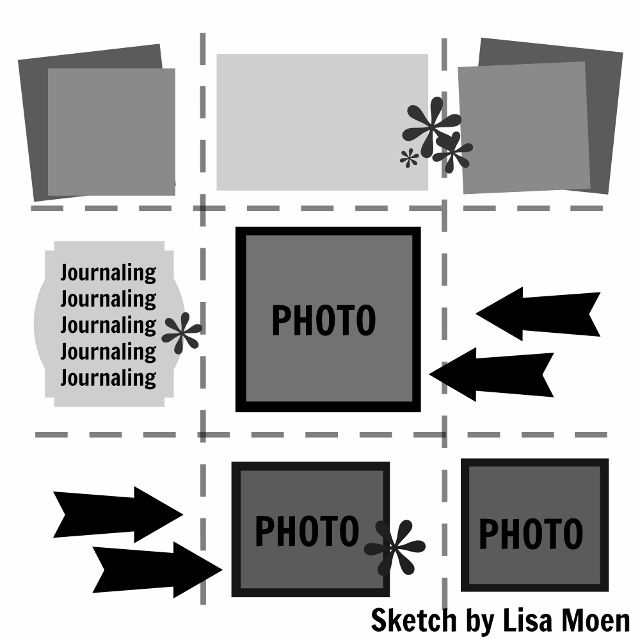
Even though the Sketchathon at My Scraps and More is over, I used this sketch. As soon as I saw it, I knew I needed to use it.

Materials:
Cardstock- Bazzill
Patterned Paper, Stickers, chipboard- October Afternoon
Brads- Making Memories, Basic Grey, Doodlebug
Letter stickers- Basic Grey
Pen- Zig
Gesso- Liquitex
Ink- EK Success, Tattered Angels
Embossing Folders- Spellbinders, Darice, Provo Craft

Monday, June 15, 2015

Happy Birthday- Fusion

Hi all!  I am back with another card to share, this time using the current challenge at Fusion:

I was inspired by the colors and the textures. I started with a piece of white cardstock and coated it with gesso. After the gesso was dry, I dry embossed it.  I then took my Cracked Pistachio Distress Stain and ran it over the paper.  The banner panel was also dry embossed.  I used Picket Fence Distress Stain to accent the texture.  This card was for my brother-in-law, who is a musician, so I used the music washi tape and wrapped it around another piece of cardstock. A heat embossed sentiment, a punched and inked star and some star embellishments finished it off.

A Perfect Pear- Stick It Down Guest Designer

Hi all!  I am here today with a card I created as a guest designer at Stick It Down.  My card was selected in April as a favorite, so I was invited to guest design with this great card sketch this month:


Here is what I made:


I pulled out some old Cosmo Cricket scraps and started mixing and matching and cutting.  I stamped the sentiment with pink ink.  The pear was fussy cut from some of the paper and then heat embossing with iridescent clear embossing powder.
You can see the shine from the embossing powder a little better here. Make sure you head over to Stick it Down and check out all of their sketches this month!

Friday, June 5, 2015

Mojo Monday #400- Happy Birthday

Hello! I'm back with a couple more cards.  I went on a bit of a card making binge the other day. If you have followed my blog for a few years, you know this is a good thing, because this time of year is card making (and sending) season! There are A LOT of birthdays and anniversaries in our family during the months of June and July.

Up first is a birthday card I made for my sister.  I was inspired by the current sketch at Mojo Monday:

For the background, I wet down a piece of watercolor paper and dabbed some Distress Stain on it. The water made the stains bleed and spread, leaving a dreamy watercolor look. I stamped and heat embossed the flower and then colored it with Distress Inks and Stains and a water brush. I put the flower on the card and felt like it needed a bit more, so I used my Stamping Gear and stamped and heat embossed the leaves.

Here is another card I made while playing with Distress Stains.  I put a few dabs of Cracked Pistachio and Mermaid Lagoon on my Stamp Press (any slick surface works), sprayed it with water and then drug my piece of watercolor paper through it.  After it was dry, I stamped and heat embossed the cross and sentiment.  I added the tape and then felt like it needed a bit more on the left, so I stamped and heat embossed the brush stroke.

Thursday, June 4, 2015

Sketch Saturday #357- Happy Birthday

Hello all! I have a card to share today that I made for my niece whose birthday party is this weekend.  I used this sketch from Sketch Saturday:
I rotated the sketch for my card. I stamped and heat embossed the diamond background.  Then I used some Distress Stains to make the stripes. I sprayed them with water to make the colors blend and then blotted off the excess water in spot and let it dry. For the image, I stamped and heat embossed it on watercolor paper. I used Distress Inks and a water brush to paint the bears in. 
After I cut up and attached the background, I used a strip of washi tape across the middle of the card and attache the image to some black cardstock and put it on the card with foam tape.

Tuesday, June 2, 2015

VBS: God is WILD about us

Hi all!  I have another layout to share today. I hope you aren't getting sick of me playing with gesso, because I am LOVING it and I have one more lesson after this in the 5 Ways to Use Gesso class at Big Picture Classes.  This lesson was on adding texture to the background with gesso, and it was another fun technique.


I put the gesso on thick with an old gym card and then I pressed an embossing folder into the gesso to make the dots. Drying the gesso with a heat gun also causes it to bubble and have more texture, so I did that too. After it was all dry, I dropped some spray ink onto the gesso using and eye dropper. I then took a very wet paintbrush and helped the color spread over the page.  Below you can see some of the texture from the embossing folder and the heat gun.

I also took some large chipboard letters and painted over them with the gesso and spray ink to make them blend with the page. I added a fun banner accent above the title for some added interest.

Materials:
Cardstock- Bazzill
Patterned Paper- Simple Stories
Gesso- Liquitex
Inks- Pink Paislee and Imaginisce
Brads- Doodlebug
Twine- Queen and Co.
Rub ons- Basic Grey, Making Memories
Gelatos- Faber Castell
Wood Veneer- American Crafts
Enamel accents- October Afternoon, Simple Stories
Stickers Simple Stories
Tape- My Mind's Eye
Pen- Sharpie, Creative Memories
Journaling Card- Echo Park
Embossing Folder- Darice
Chipboard- Making Memories