Saturday, November 30, 2024

Birthday Layouts

Hello! Today I'm sharing several birthday layouts I made for my girls. 

First up are the layouts I made of their birthday party (their birthdays are 6 weeks apart so we frequently celebrate them with family at the same time). This layout is very photo heavy, so, I just addes some patterned paper, a tag with the journaling, a cute die cut and and larger title at the bottom. The letters of the title I cut 3 times with my Cricut and layered them for dimension. For some added dimension on the stars, I used some light pink Nuvo Drops. A few enamel dots and a metal rimmed sticker finish off this layout.

I recieved a border "kit" at the crop last weekend, and I used it on this layout across the center. There were lots of Creative Memories border punches available, so I used a couple of those here. I cut the title with my Cricut. I matted the large star sticker and then layered the snowflake sticker over the top. I used the rest of the stickers as embellishments around my page. A few frosty colored sequins completed this layout.
Next up is a layout from my daughter's actual birthday. I used this sketch from Sketches In Thyme:

I started with a sheet of cardstock that had resist polka dots on it. I rubbed a Distress ink pad over the background. The ink pad is a little dry, so I spritzed the ink with a little water to help it blend a bit. I then layered some patterned papers over the background, matted my photos and stuck that all down. I cut the title and snowflake on my Cricut. I embellished the page with some die cuts, stickers and sequins.

My final layout also used a sketch from Sketches In Thyme:
My photos are much bigger than the ones in the sketch, but I made them work. I started by cutting the solid triangles of patterned paper. I then cut the triangle outlines with my Cricut, along with the title. I embellished the page with some stickers. I filled in the letters of "Birthday" with Liquid Pearls to make them stand out more and finished off the crown with some clear gems.


Friday, November 29, 2024

Hello Autumn

Hello! I hope you had a wonderful Thanksgiving! I have a fall page to share today! I was inspired by the colors and fall images on this mood board from Paper Issues:

I also used this sketch from Scrap a Sketch:
This paper collection had the right colors and brought out some of the colors of the photos, so I went to work. First, I cut the triangles of patterned paper and adhered them to the background. I then arraged some patterned paper scraps as the mat to my photo collage. I wrote my journaling on a journaling card and tucked that behind my photos. To embellish the page I fussy cut the leaves and pumpkins from the cut aparts in the P13 Autumn Collection. I used a sticker from another collection for the title and matted it on coordinating patterned paper, adhering it with foam tape for dimension. I finished off the layout with a scattering of Dirty Bronze Nuvo Drops.


Thursday, November 28, 2024

Outdoor Fun

Hello, I am back with a couple more layouts to share. The first one is a scraplift of this layout from Paper Issues:

I loved the stitching and fringes on the inspiration layout, but I didn't have my sewing machine with me and I wasn't going to cut the fringes with a regular scissors. I decided to tear strips of paper to give the distressed edge and layer up the strips. (FYI- 12 x12 paper set at an angle does not reach all the way across the page, so I cut each strip in half and covered the gap with my photos.) I found the words cut file when I was working on the layout below, but didn't end up using it on that one. I thought it worked well on this one so I cut it and glued it down the left side of my layout. I used some stickers, chipboard pieces and puffy stickers to complete the embellishment cluster. 


For my second layout, I started with the greenery patterned paper. I wanted some sort of pattern on the bottom of my layout, so I used a mask and ink to create the polka dots. I then used some punches to create the strips across the middle of the layout. I used my Cricut to cut the flowers on the top left and the title on the bottom right using coordinating cardstock and patterned paper. One of my strips of patterned paper wasn't quite long enough, so I cut the sun to cover the gap on the left end of my layout. For embellishment, I used some stickers from the collection and some sequins.


Wednesday, November 27, 2024

December Calendar Page

Welcome back! Today I am sharing my December calendar page. As usual, I started with the two page sketch from Stick It Down:

I busted out some of the supplies I received in a Christmas Warehouse box from Simple Stories two years ago. I hadn't used the stamps in the enclosed stamp set, so I decided to use the poinsettia stamp for the border around my page. I just alternated colors and rotated the stamp for each flower to keep it interesting. I divided the photo spots to display multiple photos. I added 4x6 mats behind the photos and just angled them so they peeked out from behind the photos. I used journaling strips and used the Cricut to cut out "December." The words "holly & jolly" were from a foam word sticker set. I then dug through the embellishment and layered them up in a couple of clusters. To finish things off, I added some large gold sequins.


Tuesday, November 26, 2024

Soccer Layouts

Hello! I went on a scrapbooking retreat this past weekend and got 20 pages done, so I will have lots to share over the next several days! First up, I made a layout inspired by this sketch from  Rochelle Spears:

I also incorporated Scrap With Stacy's Tic Tac Toe challenge:

I used the right column. I only used two photos, but since one of my photos was bigger, it still worked well with this sketch. I then found some fun patterned papers to go with the photos. I fussy cut the soccer balls from patterned paper and attached some directly to the background and some I adhered to some felt wedge stickers for some dimension. I used my Cricut to cut the word "Soccer" and some of the stars (a punch was used for the smaller stars. I found a journaling card in a coordinating color and added some info. To finish the title, I used some letter stickers. For added embellishment, I used some rub ons, enamel flair pieces, enamel letter stickers, puffy stickers, and silver brads.


I used the same papers and embellishments in a coordinating design for the facing page. I put my Cricut to work again to make the pennant. 
Thanks for stopping by and make sure to come back tomorrow to see more!

Sunday, November 17, 2024

Cards and Challenges

Hello! I have a few cards to share from the last couple of months that were inspired by challenges.

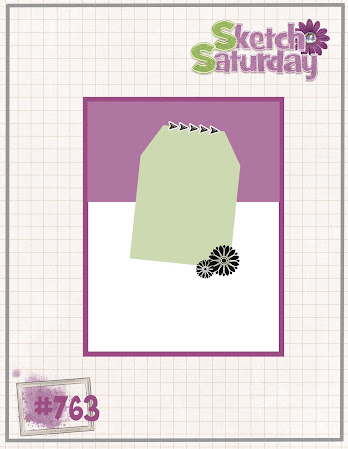
First up, I was inspired by this sketch from Sketch Saturday:
I started by dry embossing a piece of whitewash Core-dinations cardstock and sanding the raised areas. I then layered a piece of patterned paper over it and found matching ink to ink the edges. For the tag, I used different blue Distress and Distress Oxide inks and used the smooshing technique, drying between colors. The sentiment and picture were cut from patterned paper and attached to the tag. I stapled a piece of blue ric rac to the top of the tag. To finish off the card, I added a puffy star sticker and some clear star sequins.

My next card was inspired by this sketch from Stick It Down:
I found a sheet of patterned paper that had been in my stash a long time. It had green leaves spread out over it. I ended up getting out my leaf stamps in a similar style and adding more leaves to the paper in different colors. Then I cut it into pieces and used it on my card front. I layered it over wood grain patterned paper. I stamped and heat embossed the sentiment and added some ink splatters to finish off the card.


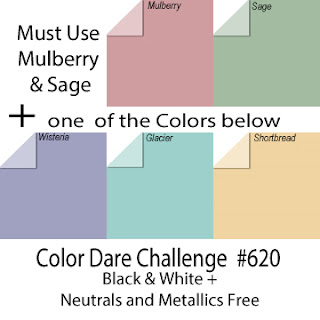
Finally, I have a card inspired by this color challenge:
I used a set of masks and found inks that were close to the colors in the inspiration image to create the background. I stamped and heat embossed the sentiment on coordinating cardstock and drew stitches around the border of my card front. I used my Cricut to cut the cake. I used Nuvo drops for the flame and took a fine tip Sharpie to outlin the frosting to make it stand out a bit.


Sunday, November 10, 2024

November Calendar Page

Hello! I am back with my November calendar page. I started with this sketch from Stick It Down:

I started by cutting leaves instead of hexagons for this fall page. I laid those out on my kraft cardstock background. Then I used my sewing machine to add some detail to the corners of my layout. I then laid out my photos. I went with 6- 4x6s and then divided those down further so I could include more photos. I typed and printed my journaling and cut it into strips which I added to my photos. I used chipboard letters and embellishments, along with a few pieces of washi tape to embellish the page.